
How to record a Podcast with remote guests on Linux
This article explains how to record a podcast on Linux with remote guests using Ubuntu, Ardour and Jack Audio Connection Kit.
We assume that you want to record your microphone(s) to your DAW (we'll use Ardour) as well as your remote guest(s) using a VoIP application (Skype, Zoom, Discord, Jitsi Meet, BigBlueButton, Nextcloud Talk…), and that you want your guests to hear you (of course) and any sound you'll be playing on your computer (VLC, Audacious, your Web browser or any other application…).
Note: If you never used Ardour, here is a very good video that will help you understand the basics: Ardour 6 Quickstart (recording, editing, mixing and exporting)
We will need the following:
- a computer running Ubuntu 20.10 “Groovy Gorilla”
- Ardour 6.5 Digital Audio Workstation (Ardour is "libre" software, with a bit of the "gratis" thrown in. If you don't want to compile it yourself, you'll be asked to pay the price you think it's worth)
- Jack Audio Connection Kit server
- JACK Qt GUI Interface, to configure JACK server
- a sound card with input and ouput (I'm using a Motu M2)
- a microphone
- headphones
Note: All this should work on other OS (all these software solutions are also available on both macOS and Windows) with some adaptations.
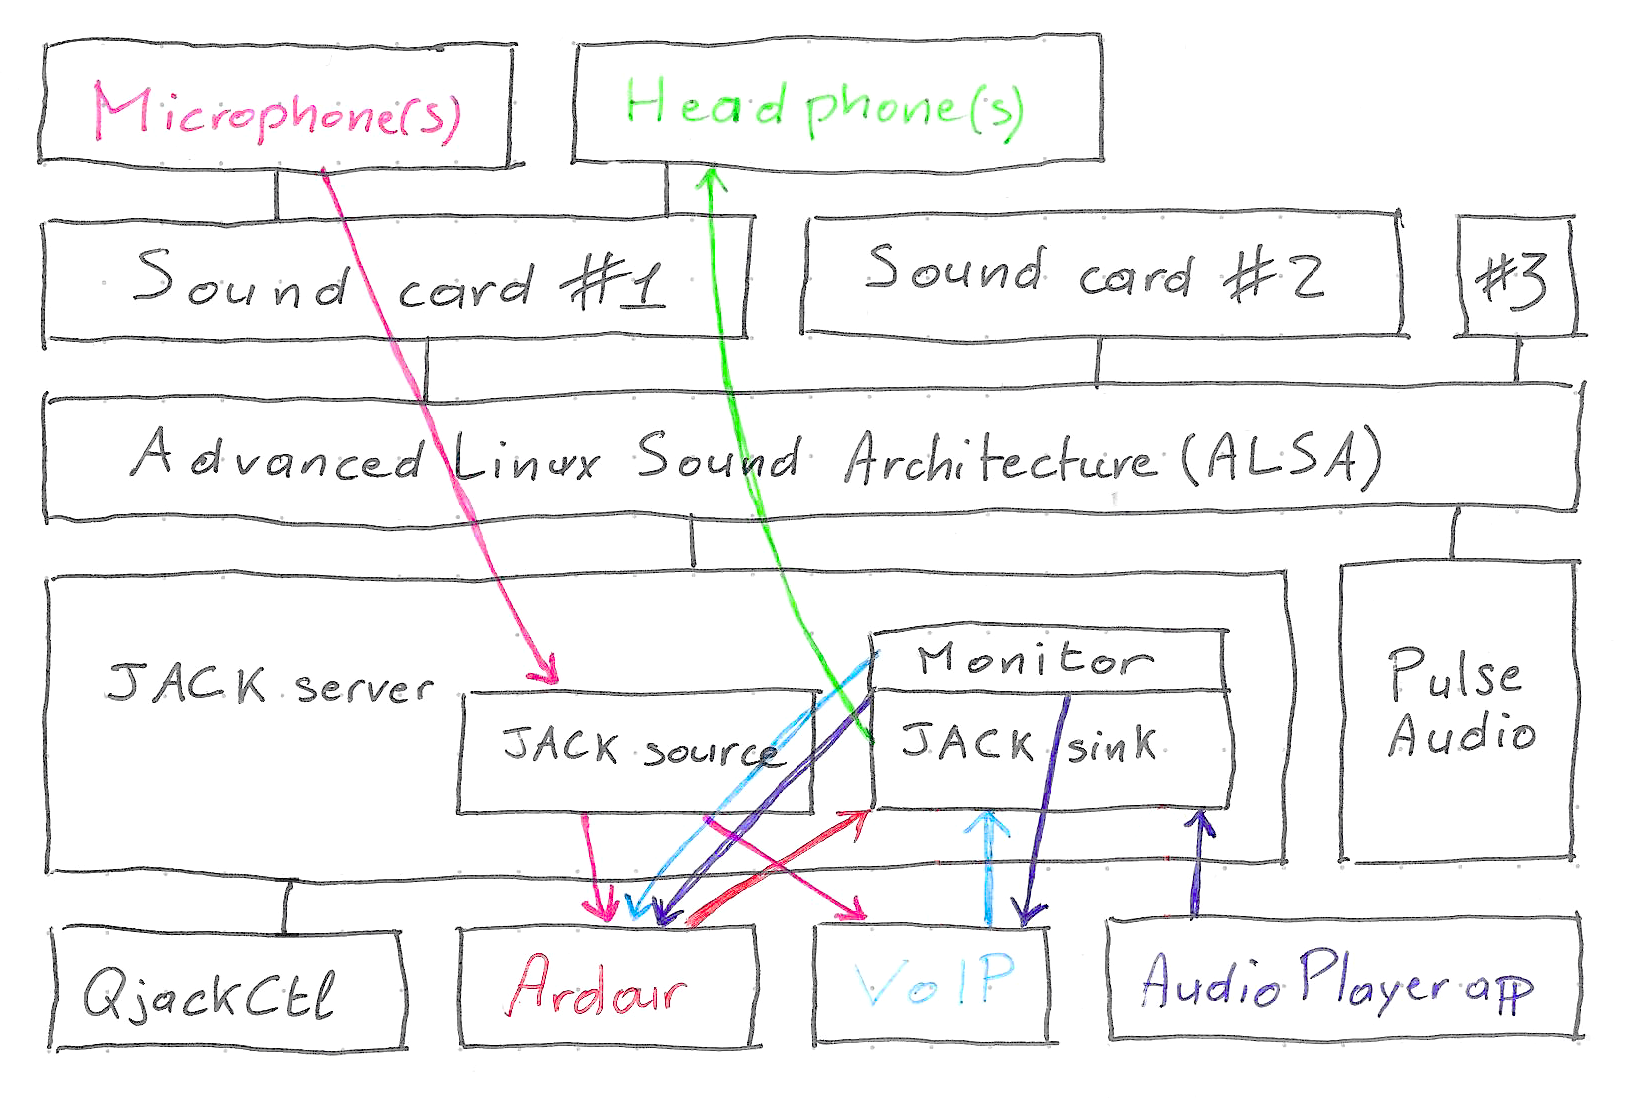
Jack server will go between your sound card and all your audio applications. It will create a virtual output PulseAudio JACK Sink and a virtual input PulseAudio JACK Source.
We send everything to PulseAudio JACK Sink and we get everything from PulseAudio JACK Source.
In a nutshell this is how it works:
-
Make sure QjackCtl and pulseaudio-module-jack are installed:
$ sudo apt-get install qjackctl pulseaudio-module-jack -
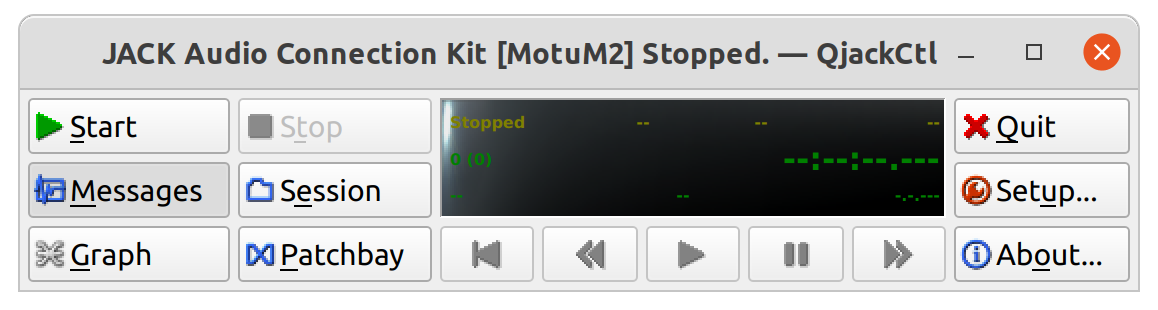
Launch QjackCtl application (JACK Qt GUI Interface)
-
Click on the Setup button.
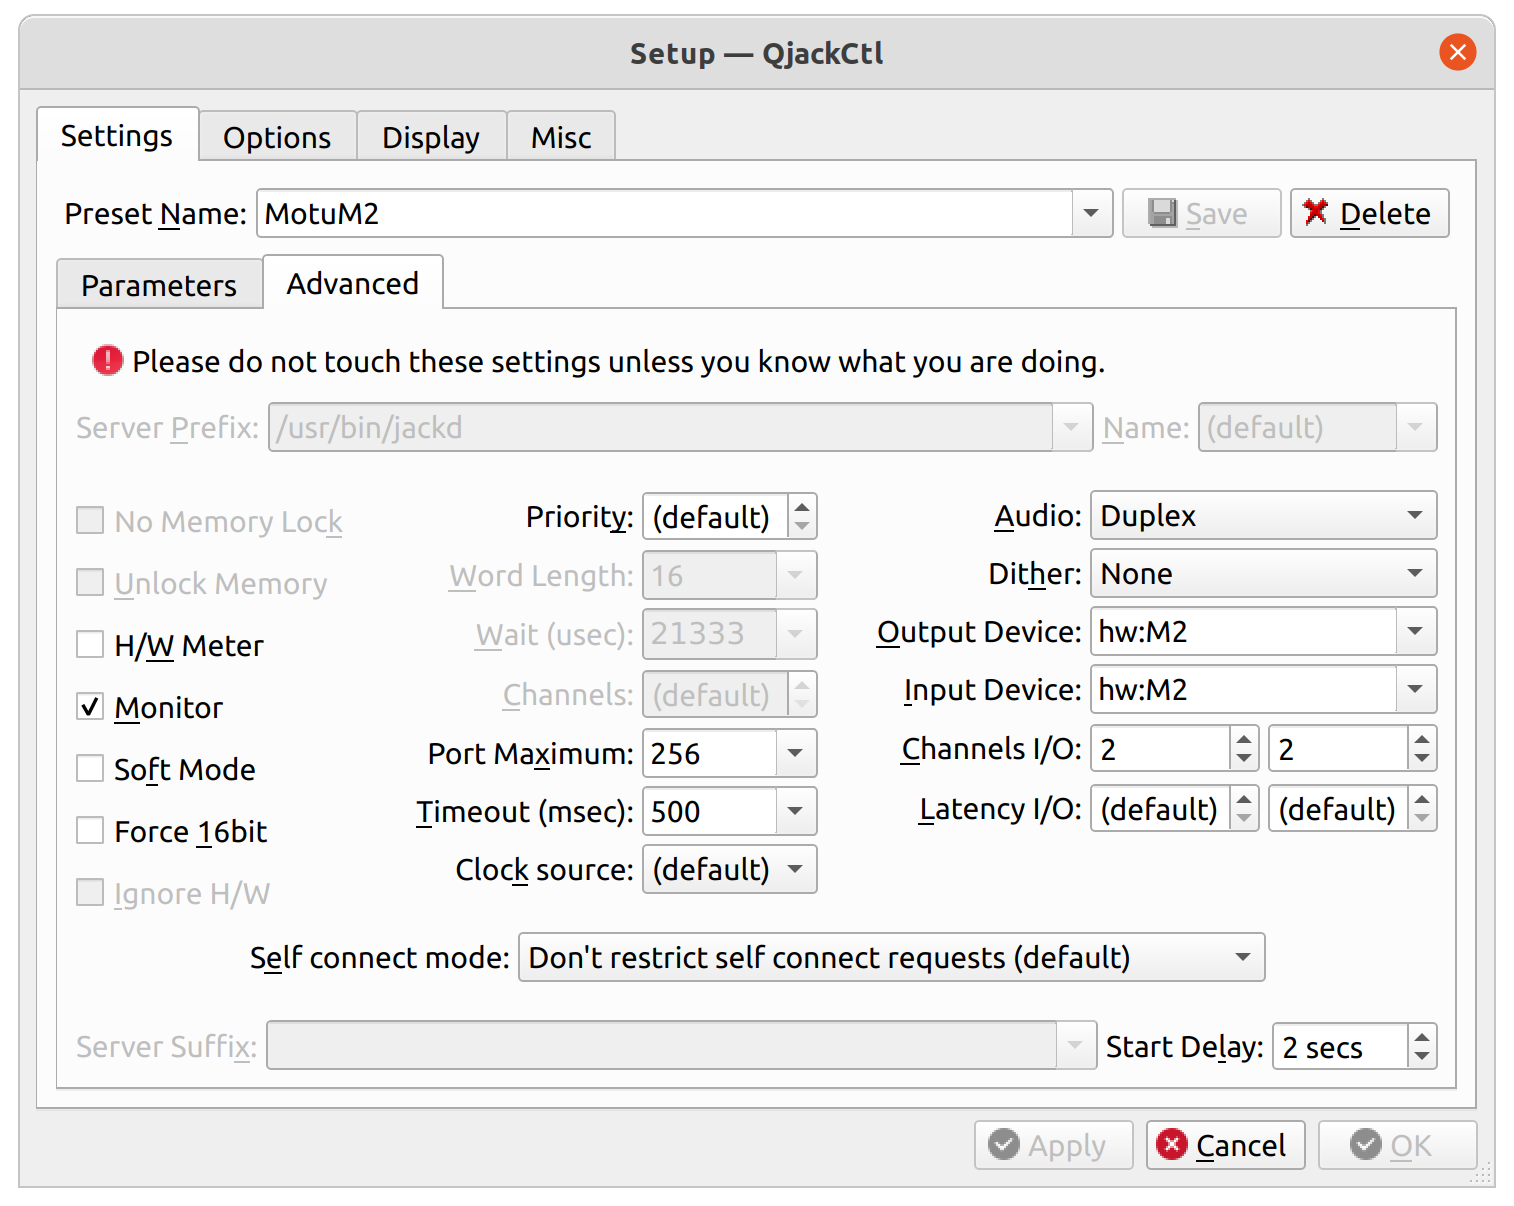
Enable the Monitor checkbox to use loopback feature and allow your guests to hear your local audio player applications.
Verify that input and output devices match your needs. If you do not know your sound card name, typecat /proc/asound/cardsin a Terminal window:
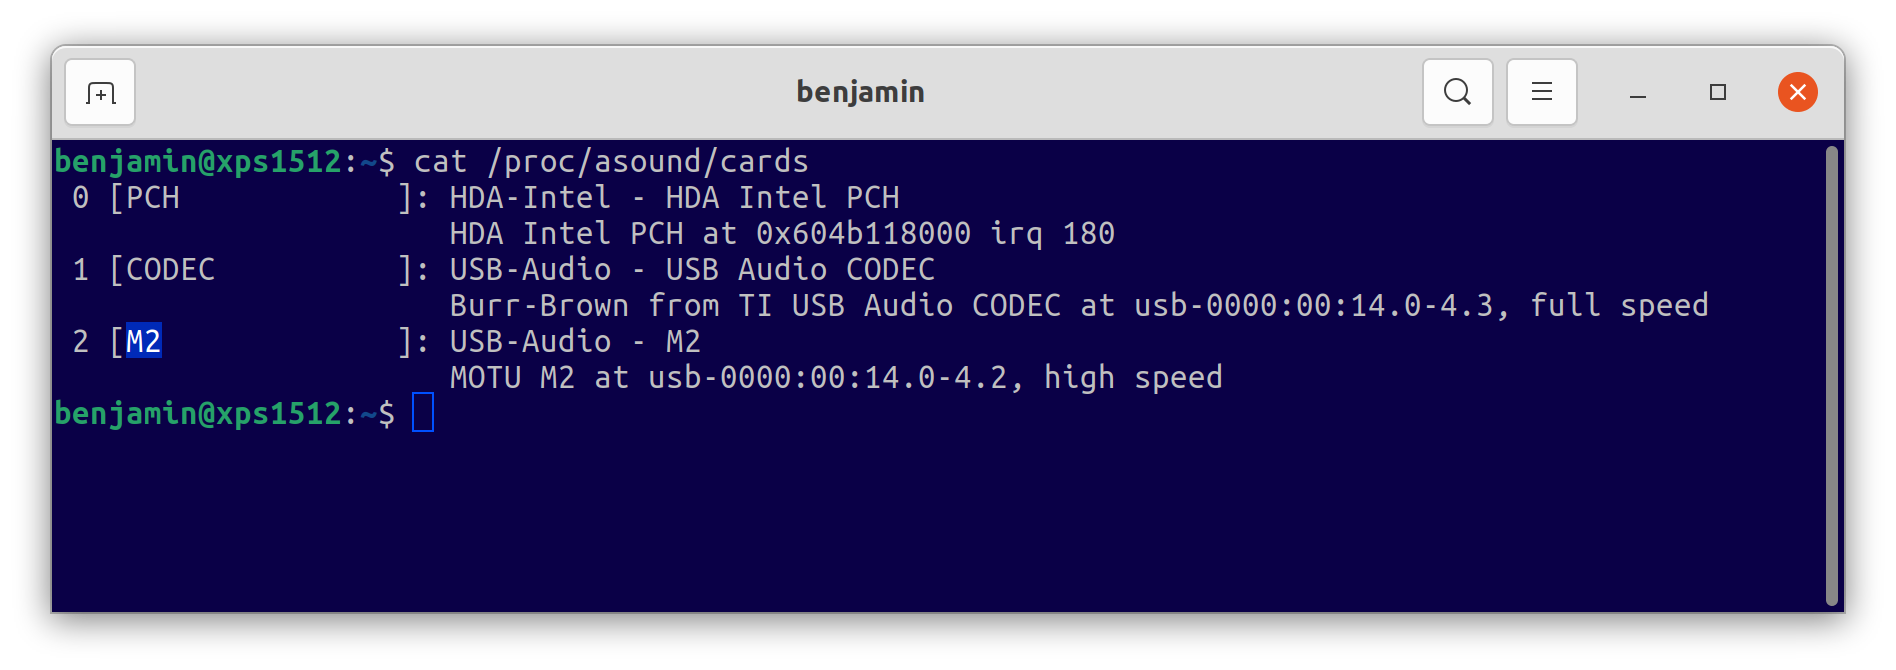
(Your card name is between brackets.) -
Go to Options:
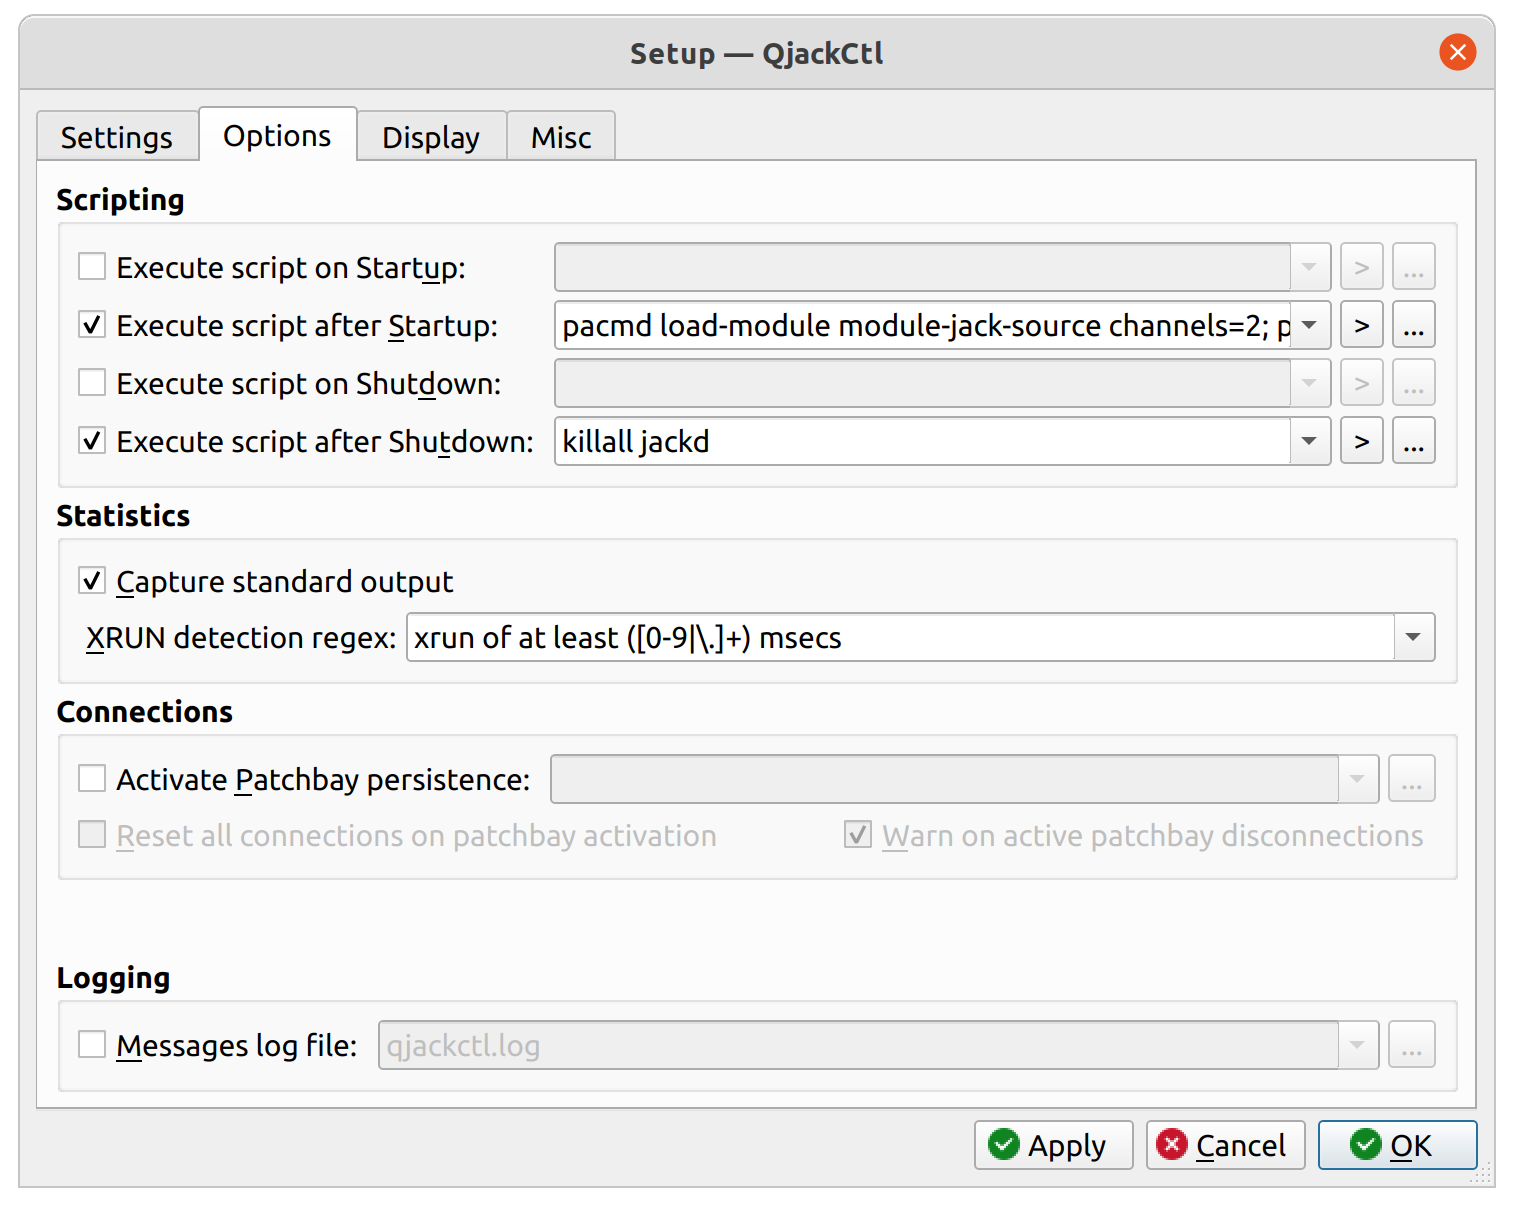
We will use this technique: “2. (Simple) Direct From Pulse to JACK”:
- In Execute script after Startup type
pacmd load-module module-jack-source channels=2; pacmd load-module module-jack-sink channels=2; - In Execute script after Shutdown type this:
killall jackd
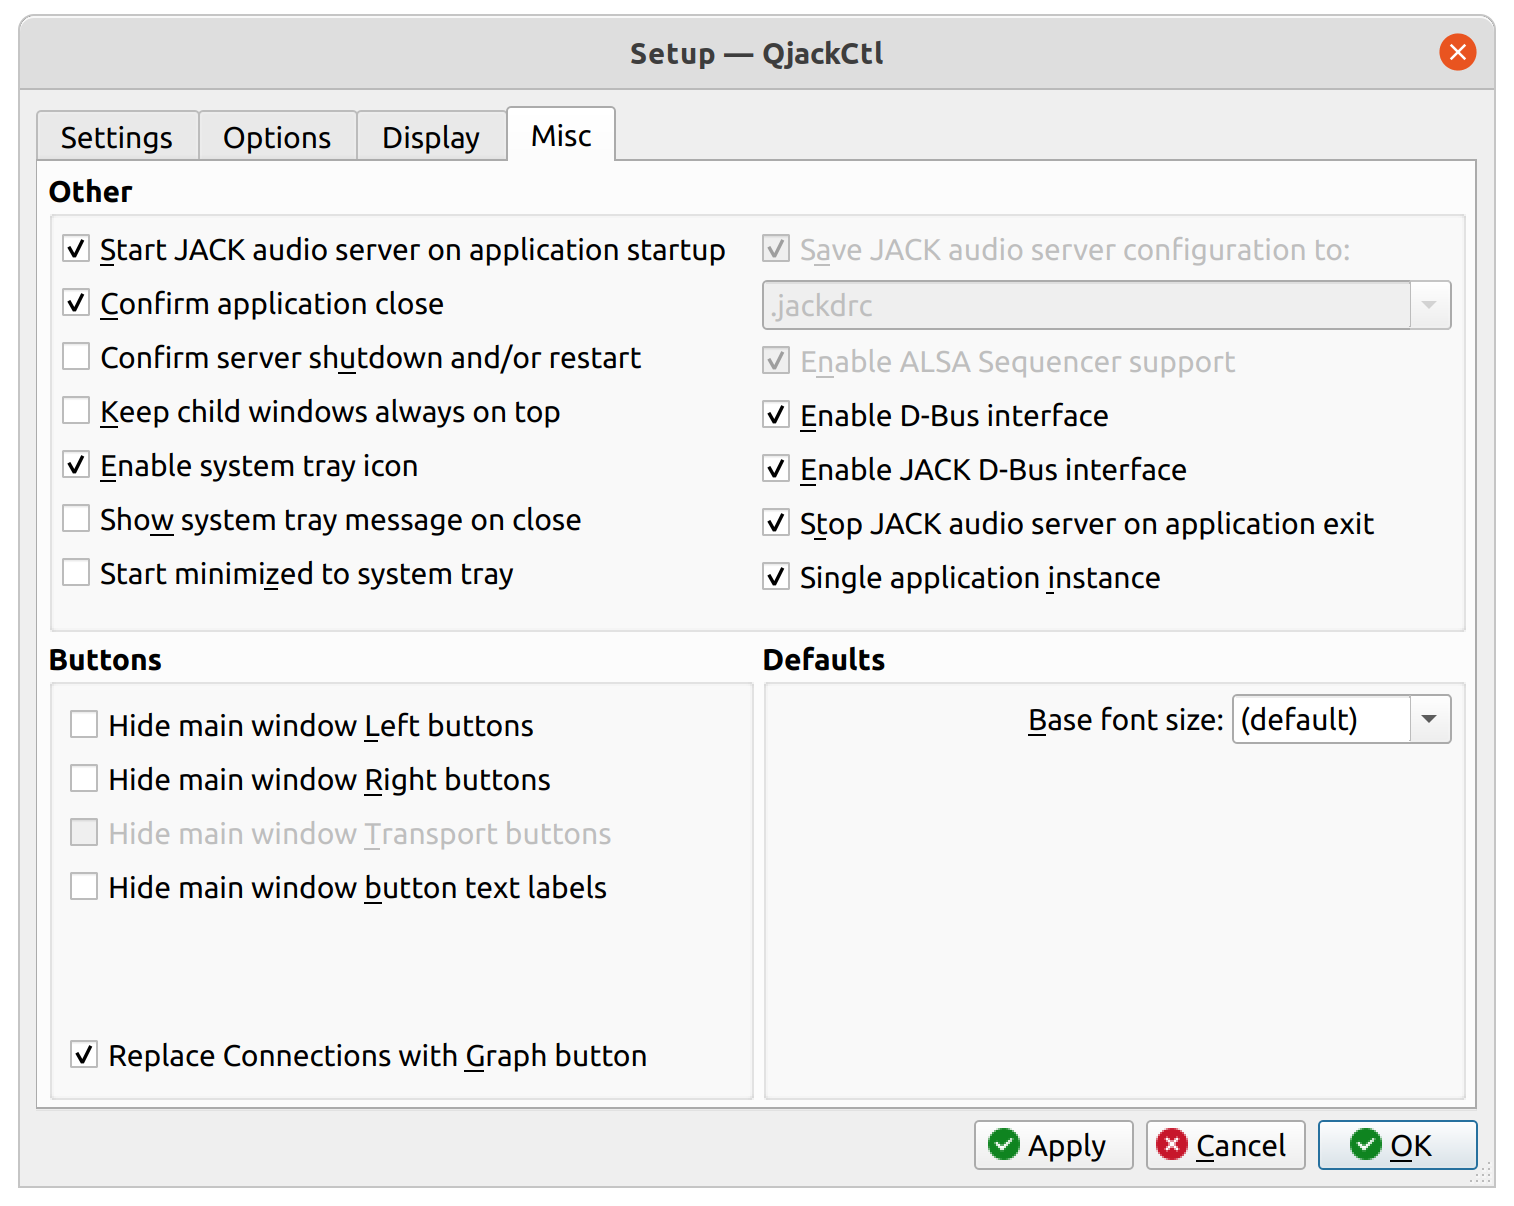
-
If you want to avoid starting Jack every time you launch QjackCtl, just check Start JACK audio server on application startup:
-
Start Jack Server. (Click on the top-left Start button.)
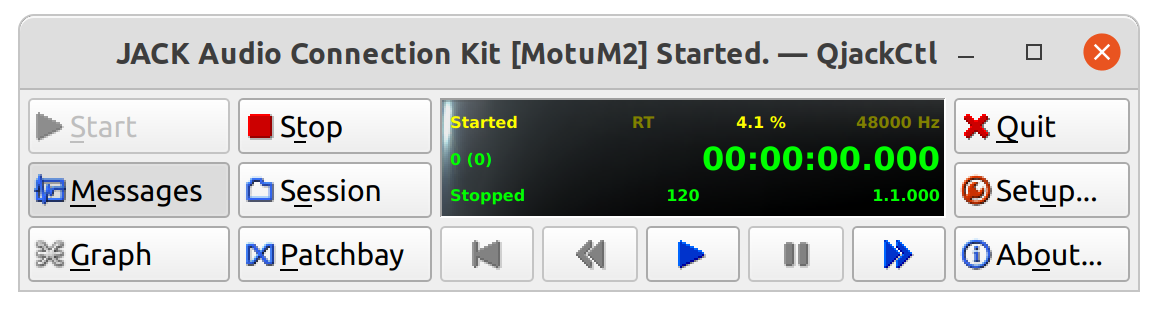
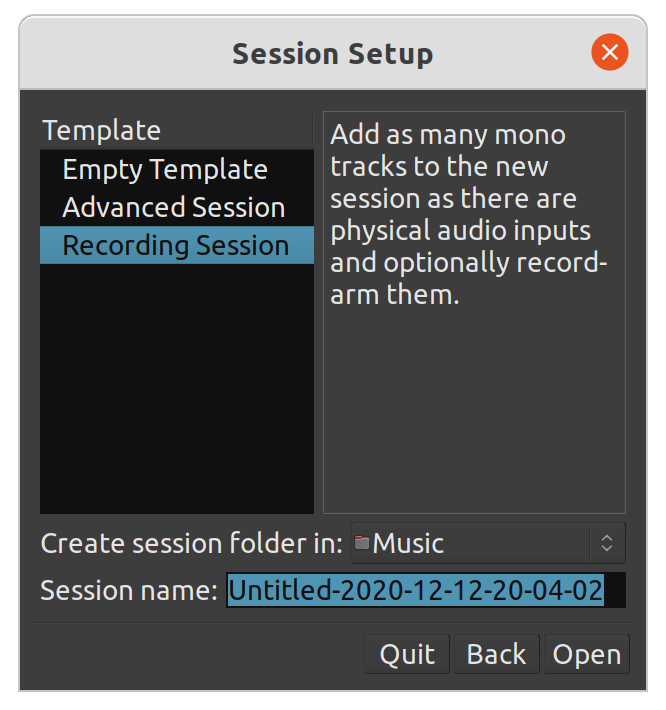
-
Now that Jack server is running, launch Ardour and create a new Recording Session:
Change the Audio System fromALSAtoJACK:

Click on Connect to JACK:
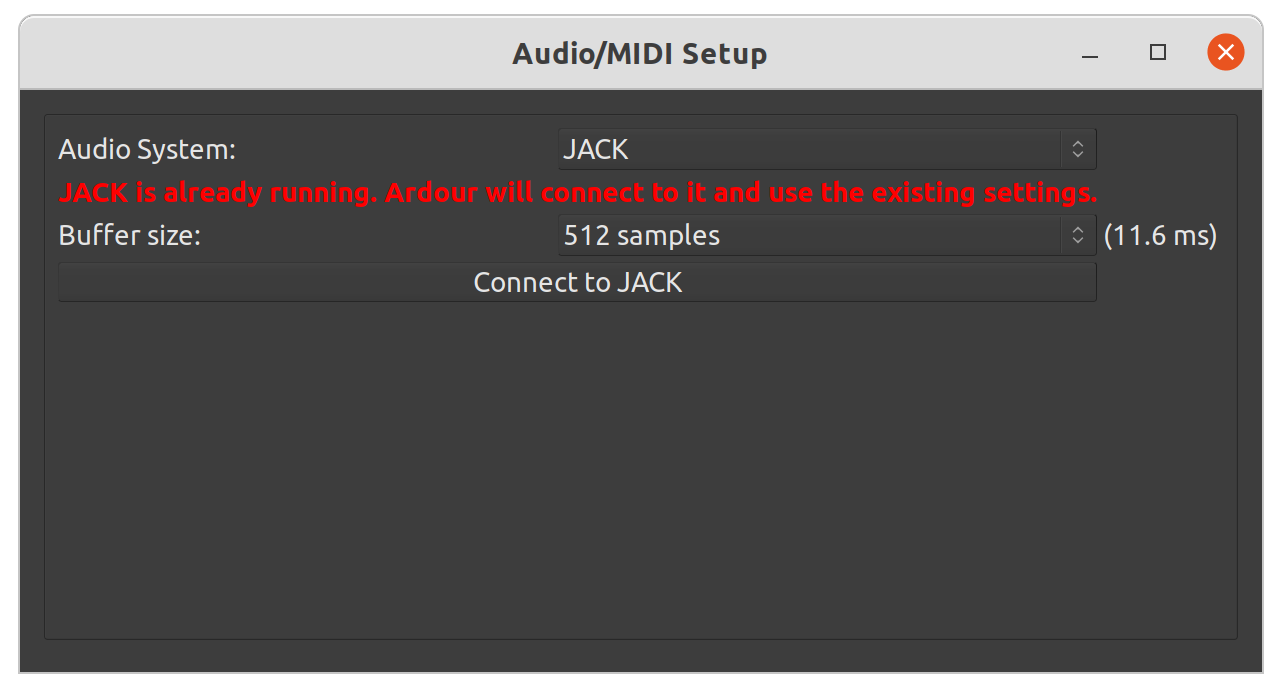
Note: If you were not asked this when launching Ardour, you may do it later by going to menu Window > Audio/MIDI Setup.
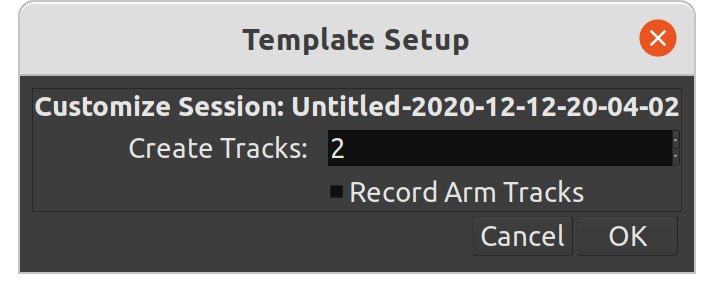
Add 2 (mono) tracks (if your soundcard has 2 microphones):
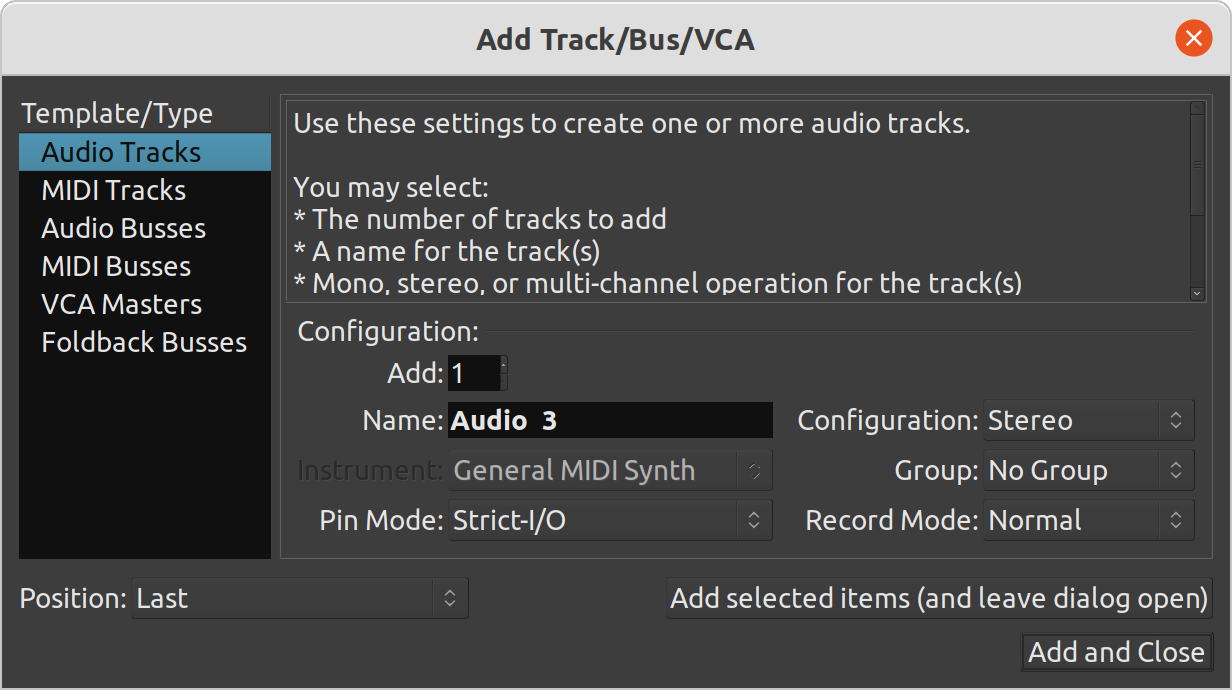
Then add 1 Stereo track with menu Track > Add Track, Bus or VCA… (for recording sound from VoIP and applications):
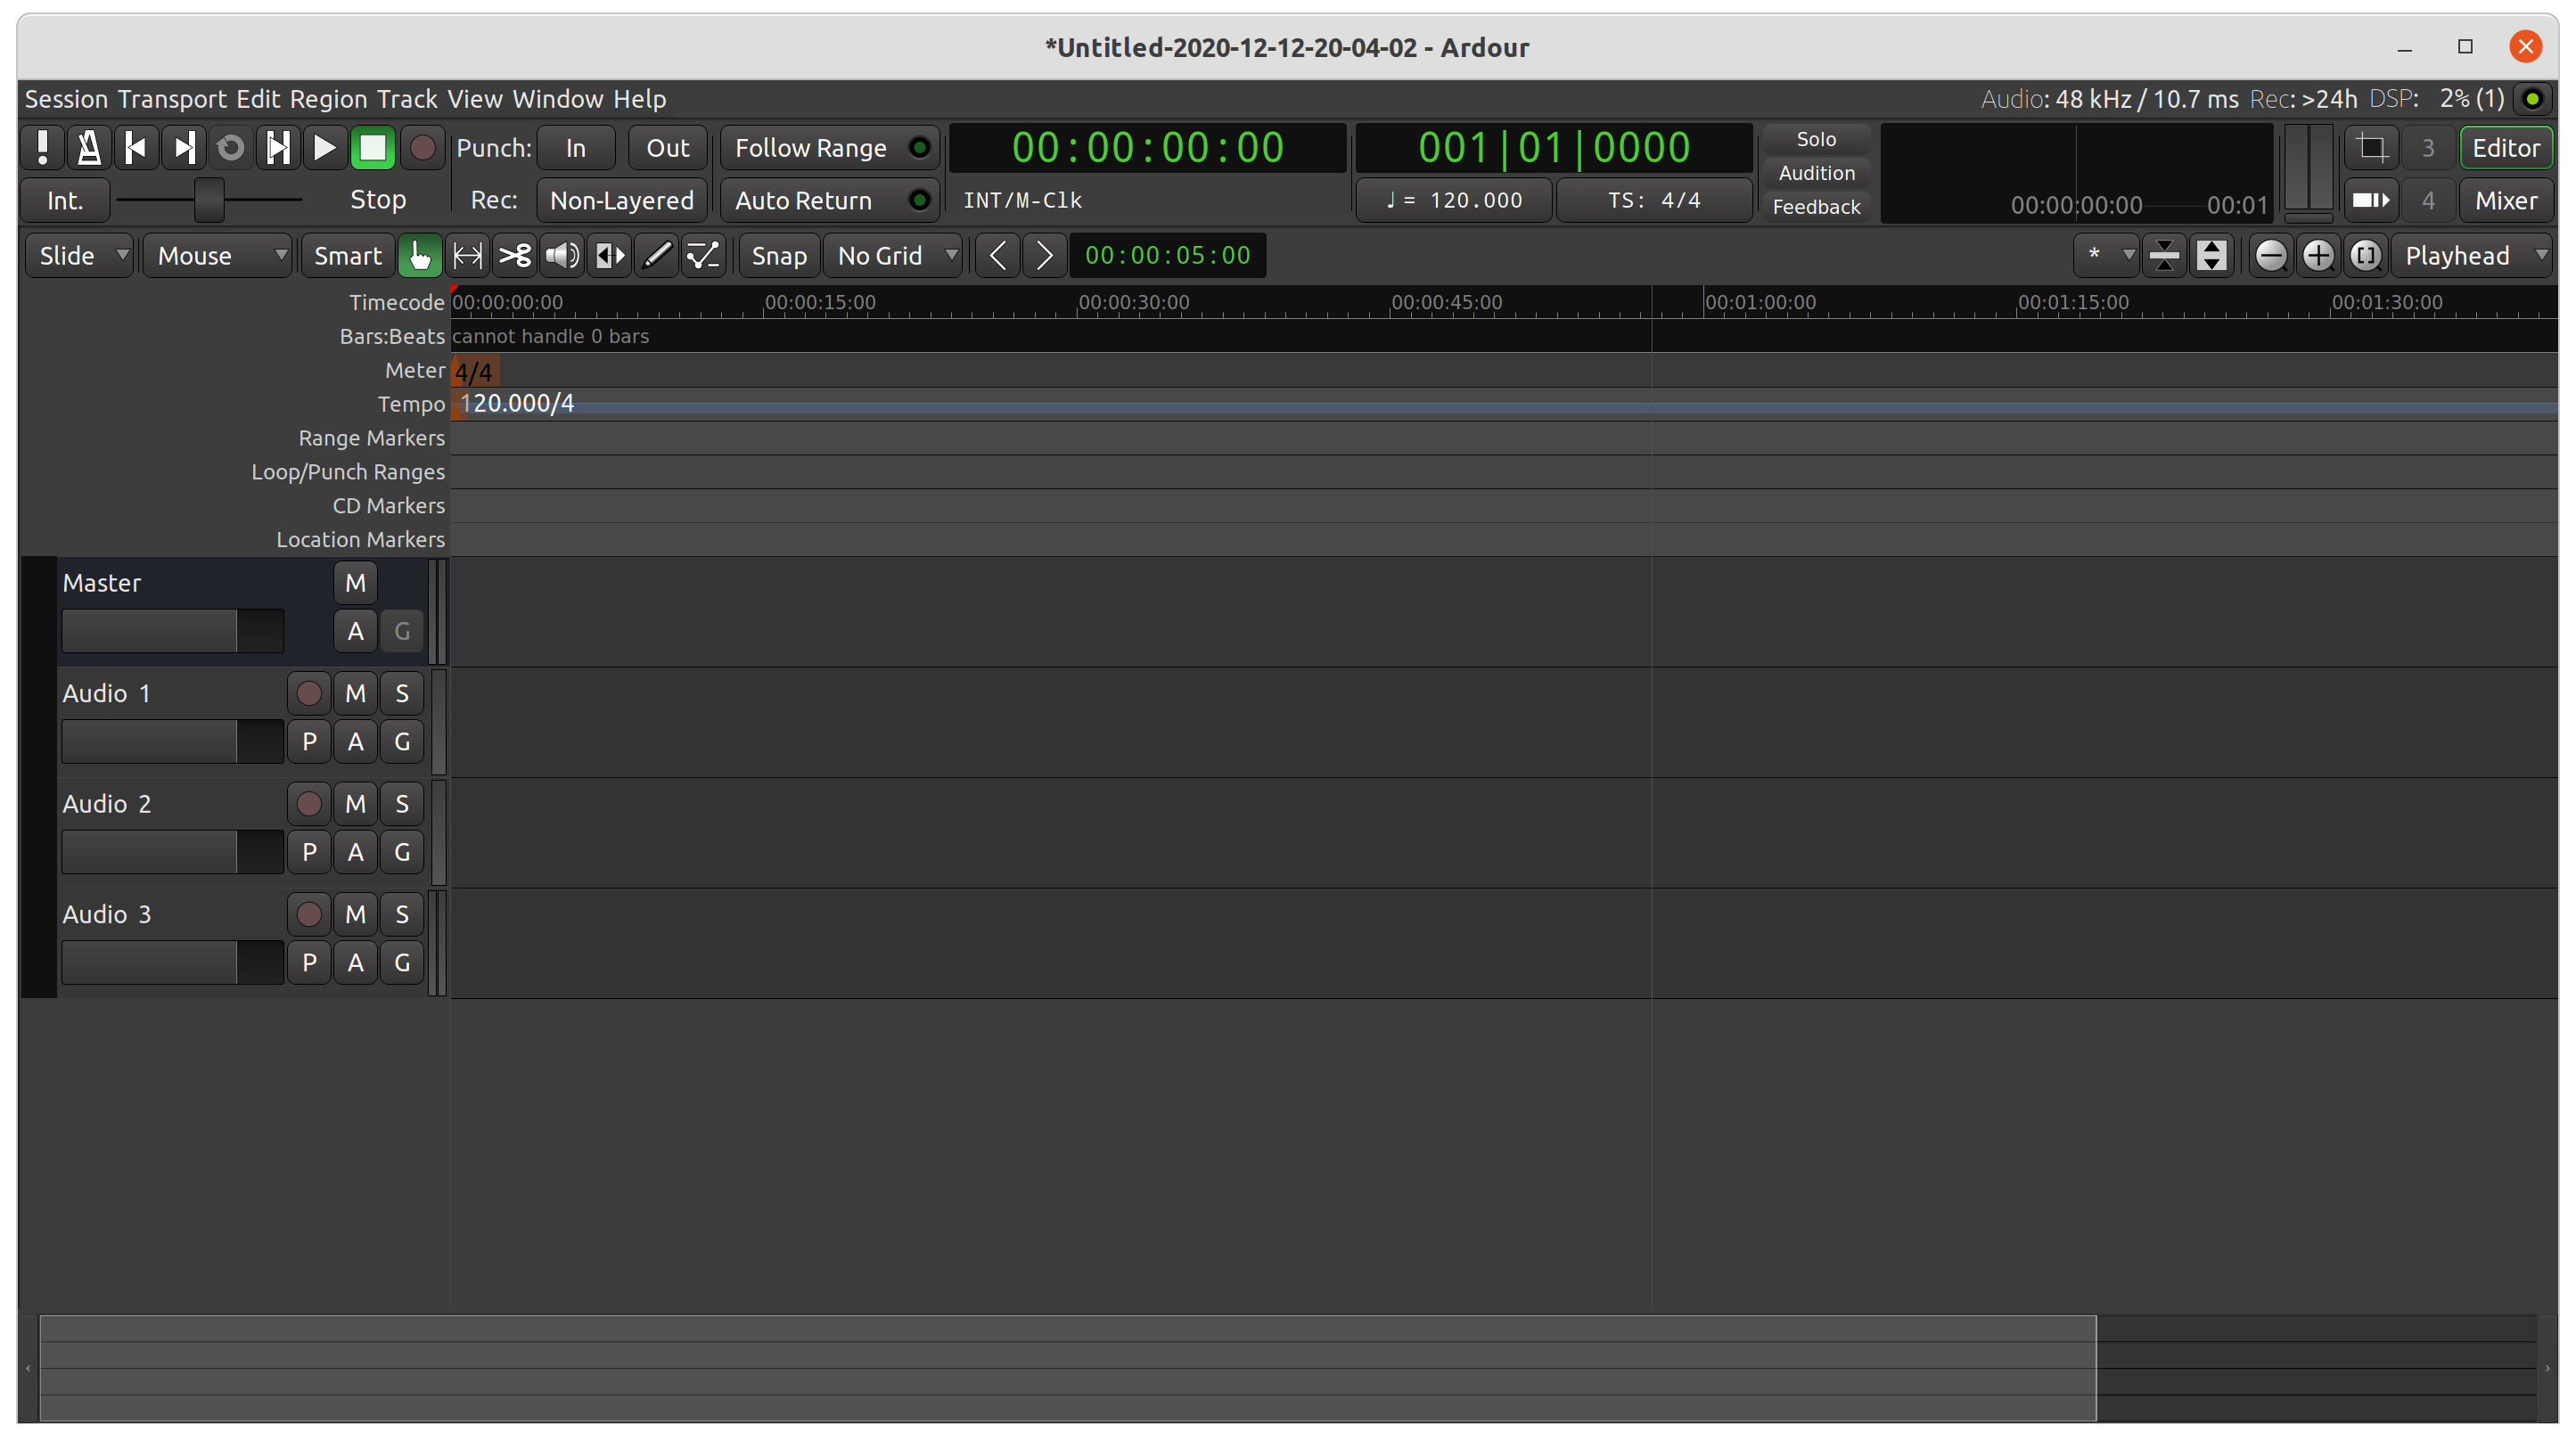
You should now see 3 tracks:
- Now that Ardour is running, go back to QjackCtl and click on the Graph button.
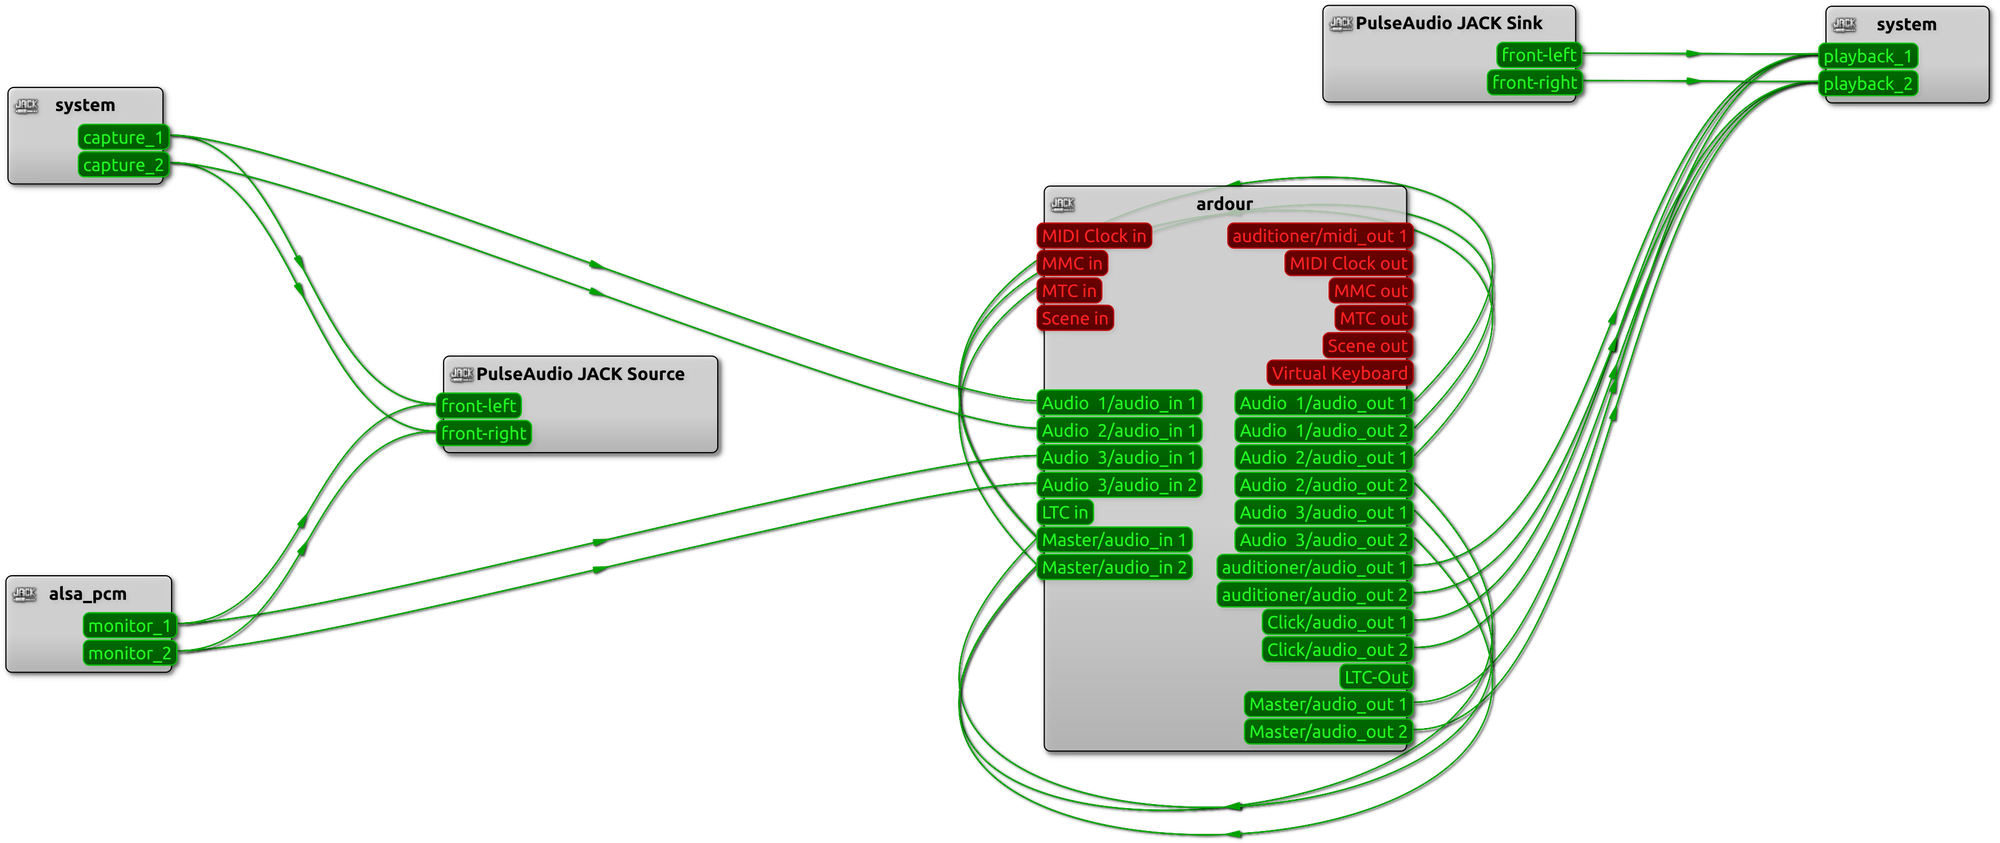
Check that the Workflow is correct:
capture_1andcapture_2(microphones) are going into both:PulseAudio JACK Source(so that your guest hears you),Audio 1andAudio 2(so that Ardour records your microphone).
monitor_1andmonitor_2(audio loopback from your audio applications) are going into both:PulseAudio JACK Source(so that your guest hears your local application sounds)Audio 3(so that Ardour records your local application sounds).
PulseAudio JACK Sinkgoes intoplayback 1andplayback 2so that you can hear every thing.- Ardour audio out go into
playback 1andplayback 2so that you can hear what Ardour has recorded when you have finished.
Note: Of course you may adapt this according to your needs.
-
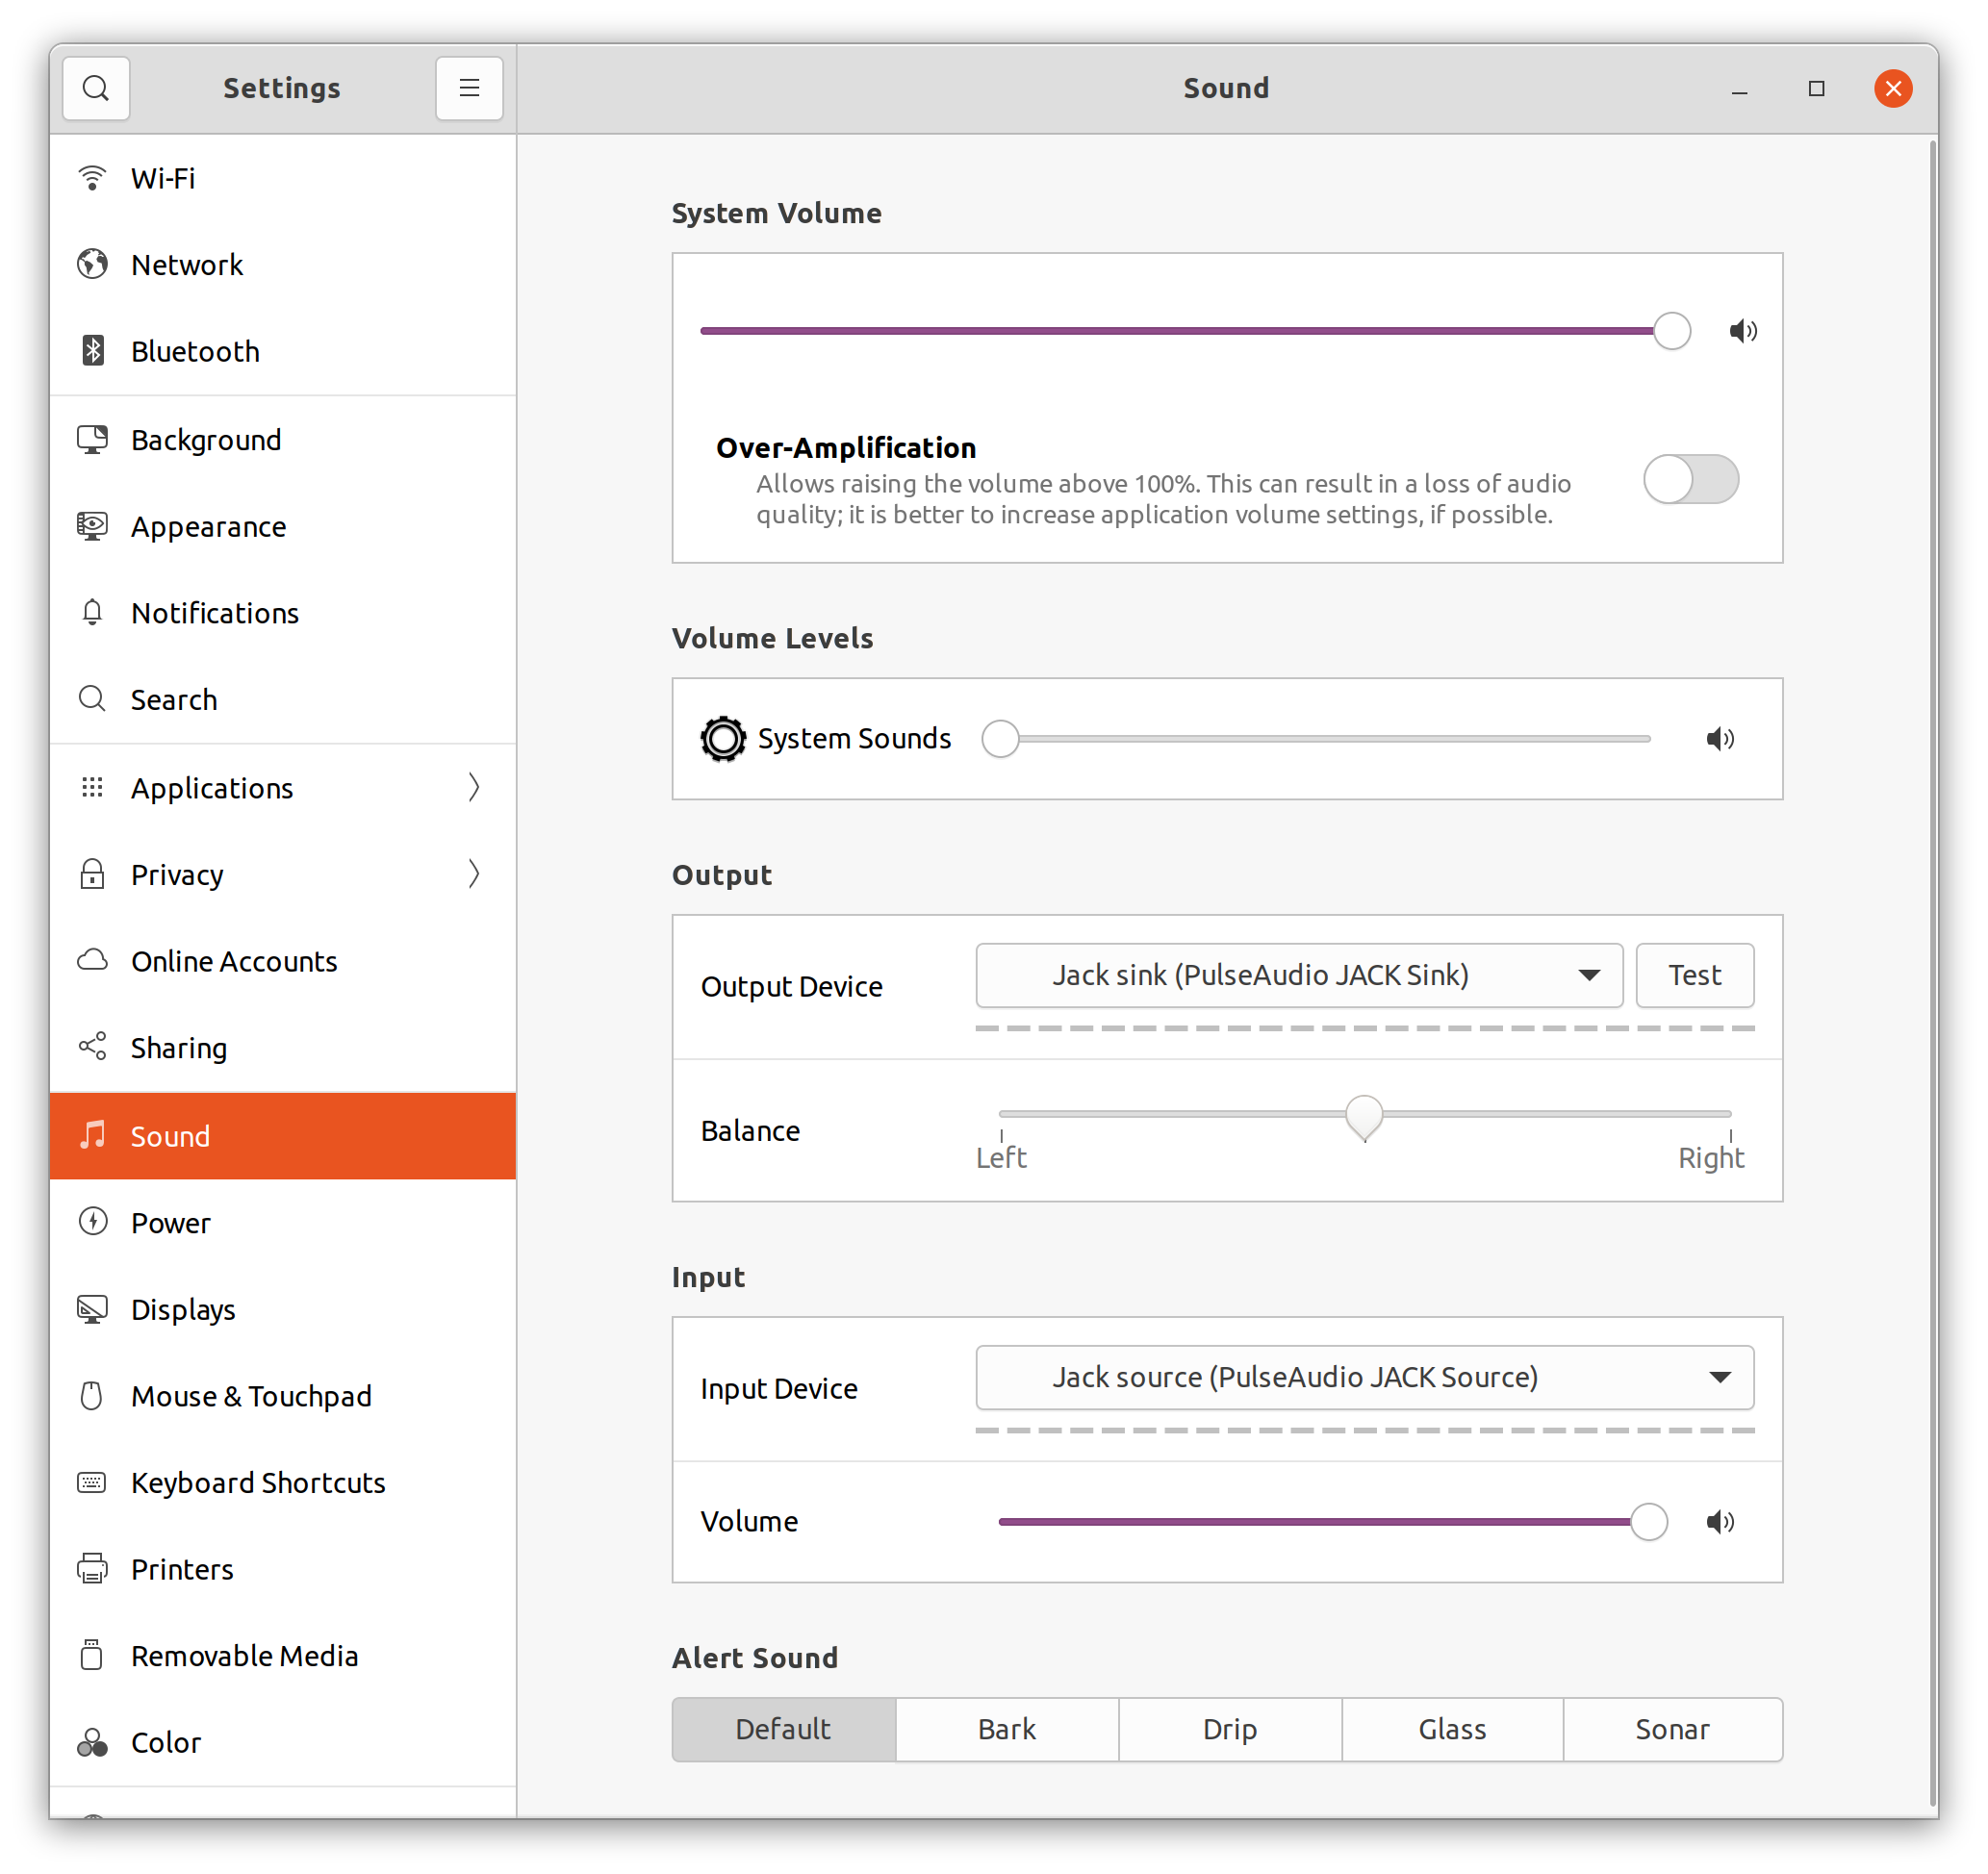
In Ubuntu Settings > Sounds, you may want to select
PulseAudio JACK Sinkas output andPulseAudio JACK Sourceas input so that all applications go through JACK:
-
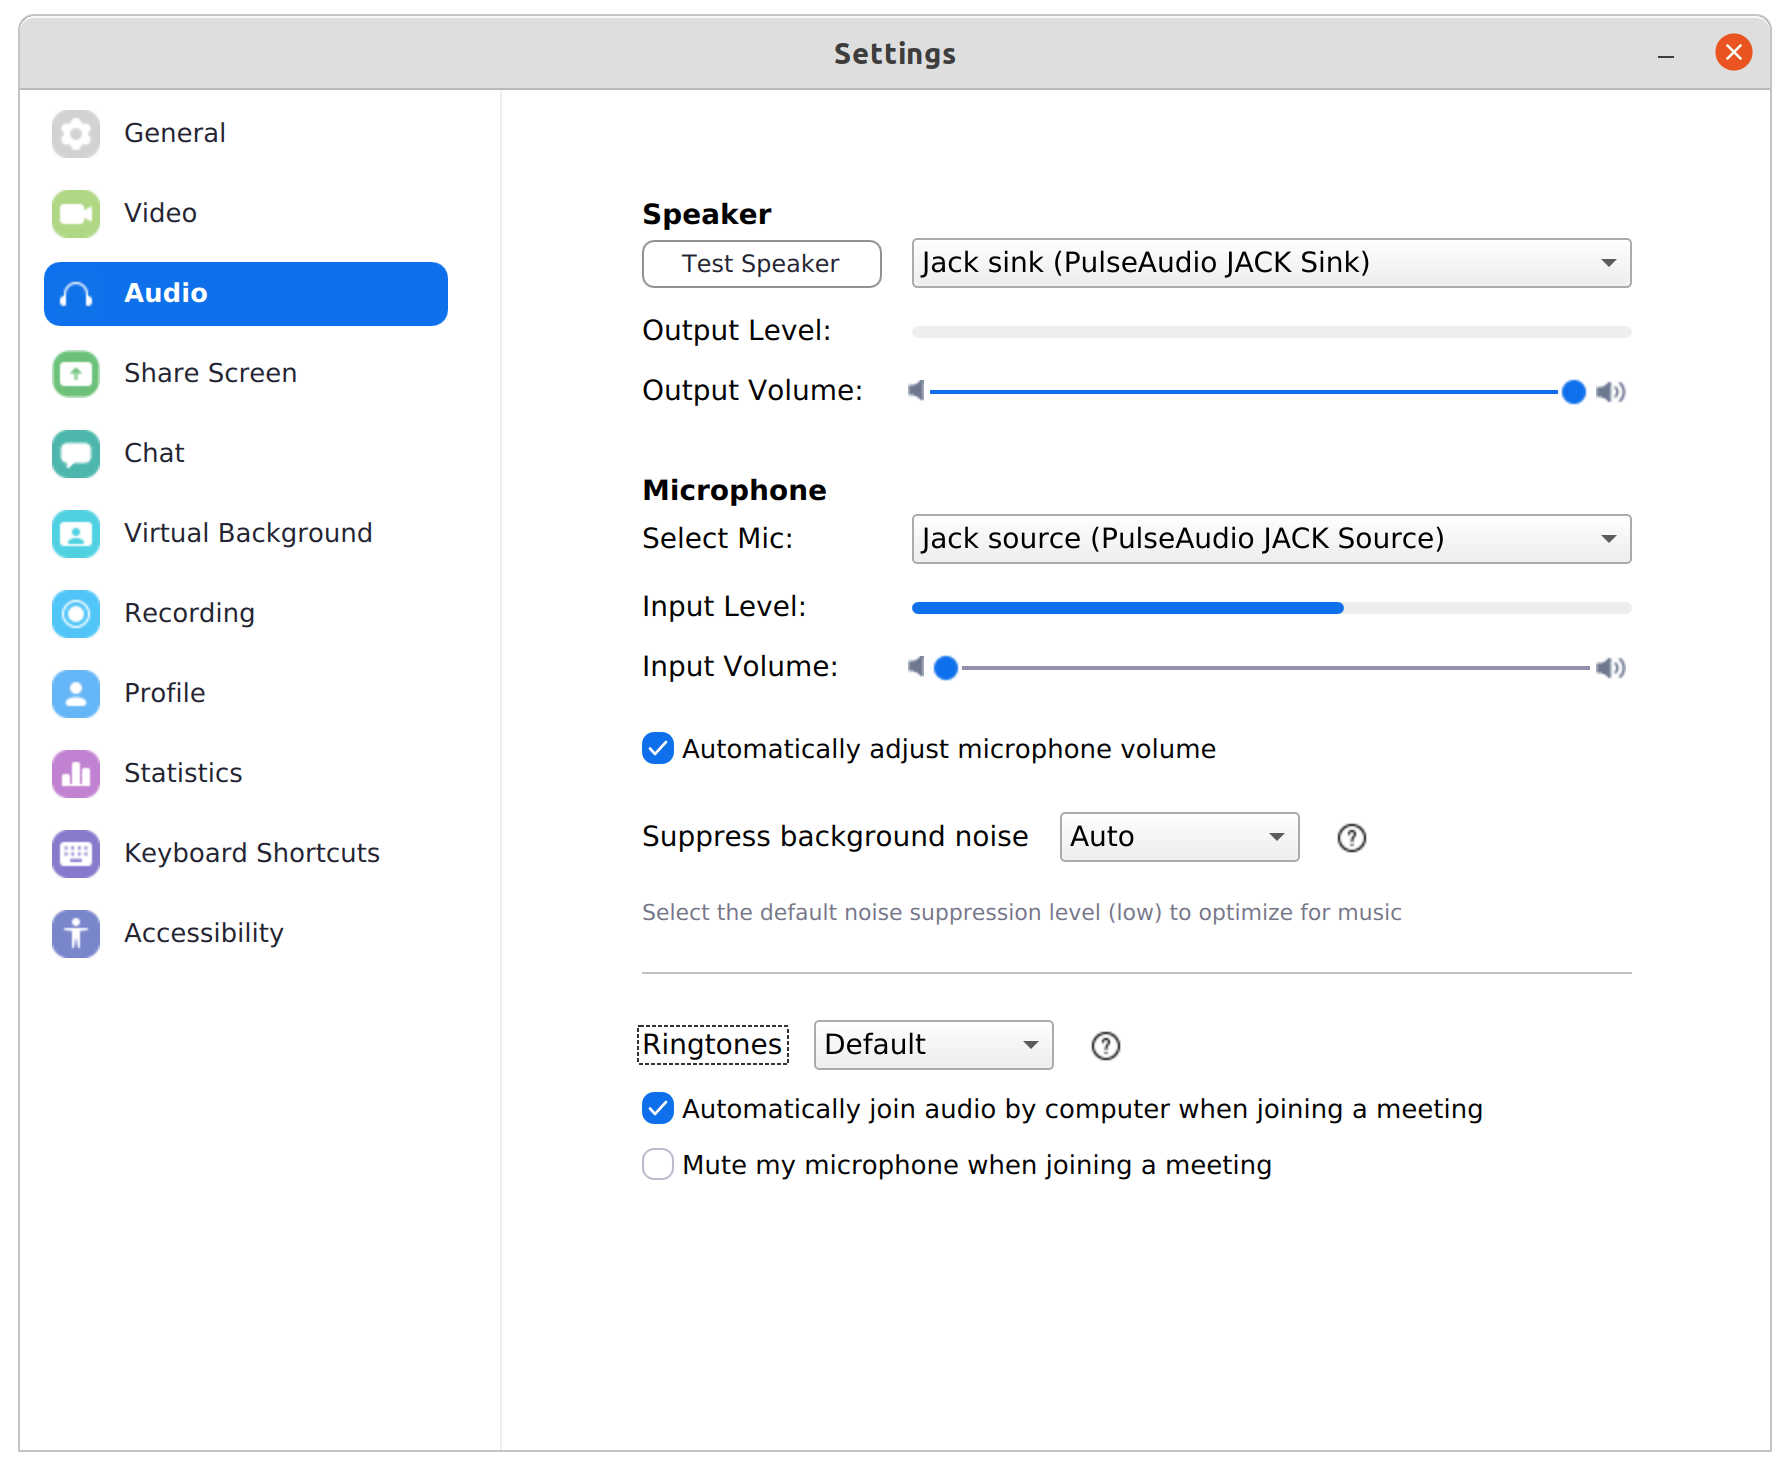
Check that your VoIP application is using JACK (they often do not use the default output):
-
Start recording!
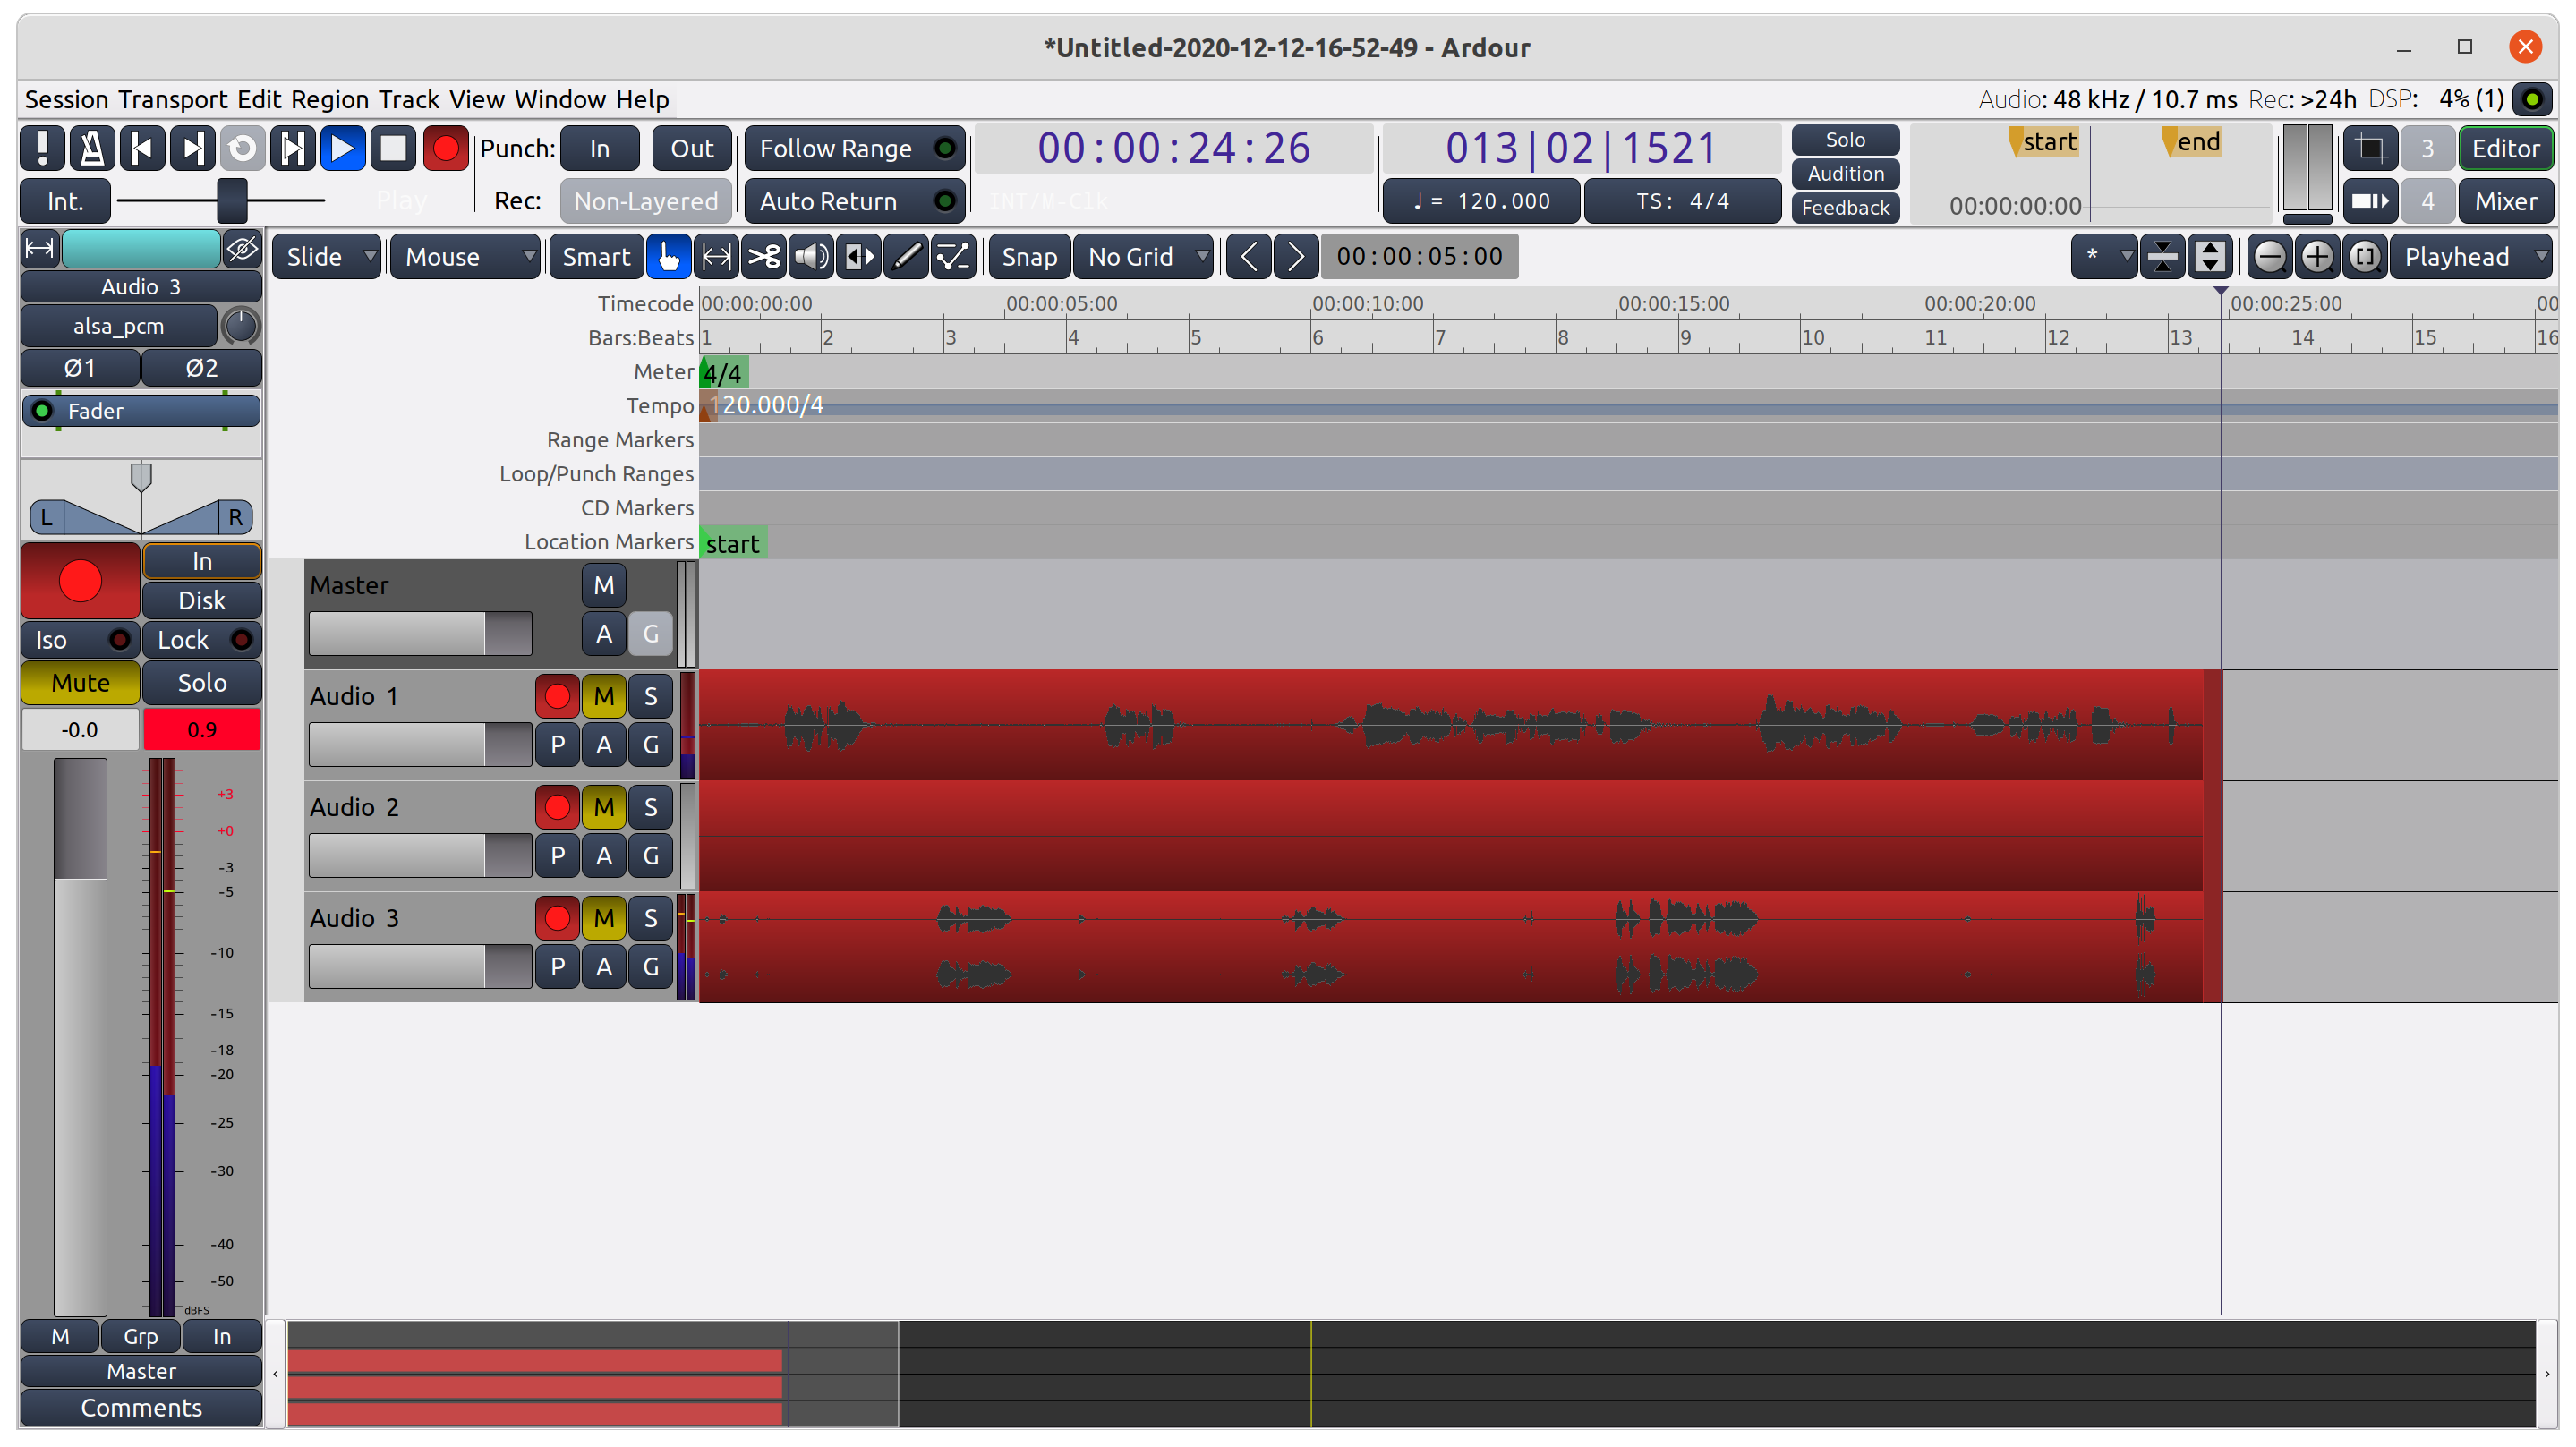
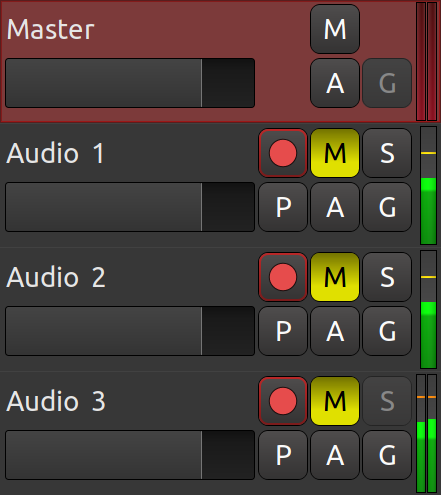
Note: In order to avoid echo and Larsen noise, mute the recording armed tracks:
Note: You should always start JACK server before Ardour, otherwise Ardour might take exclusive control on your sound card and JACK server will fail to start.
That's it, happy podcasting!
For the bolder: get the latest QjackCtl
Ubuntu 20.10 “Groovy Gorilla” comes with QjackCtl 0.5 (which was released in december 2017) but you may want to install the latest version (0.6.3 as of july 2020).
There is nothing complicated, just follow the next steps as you will have to compile it yourself.
Download and expand QjackCtl latest source code.
Install the required tools for compiling it:
$ sudo apt-get install build-essential qt5-default qttools5-dev-tools libjack-dev
Remove the old version:
$ sudo apt-get remove qjackctl
Note: the old version should be in /usr/bin/qjackctl whereas the new one will be in /usr/local/bin/qjackctl (unless you specify otherwise with ./configure [--prefix=prefix]).
Compile it:
$ cd ~/Downloads/qjackctl-0.6.3
$ ./configure
$ sudo make install
You may now run QjackCtl latest version!


