
How to record a Podcast with several remote guests
Last year I wrote an article about “How to record a Podcast with remote guests on Linux”. But what if you have multiple remote guests?
This article shows how to record a podcast with several remote guests, using several VoIP applications, one per remote guest.
The purpose of this setup is to record each guest, local or remote, in a dedicated track so that you may later edit precisely what you want to keep.
You also want all guests, local or remote, to be able to listen to all other guests, and to be able to listen to the sounds coming from your computer. (For instance if you are using PureData as a soundboard for your MIDI controller.)
Last, this setup does not require any cloud service to record remote guests as you will be using your usual VoIP applications (Skype, Google Meet, Zoom, Discord, Mumble, Jitsi Meet, BigBlueButton, Nextcloud Talk…).
Be aware that remote guests will not be recorded locally on their computer but on your computer, so any bandwidth or sound compression issue will affect the final audio quality.
If audio quality is your main concern then you should probably have a look at Riverside, Zencastr, Squadcast, Cleanfeed, Ringr, Clearcast, Iris…
Bill of materials
We used the following:
- a computer running Ubuntu 21.10 “Impish Indri”
- Ardour 6.9 Digital Audio Workstation (Ardour is "libre" software, with a bit of the "gratis" thrown in. If you don't want to compile it yourself, you'll be asked to pay the price you think it's worth)
- Jack Audio Connection Kit server
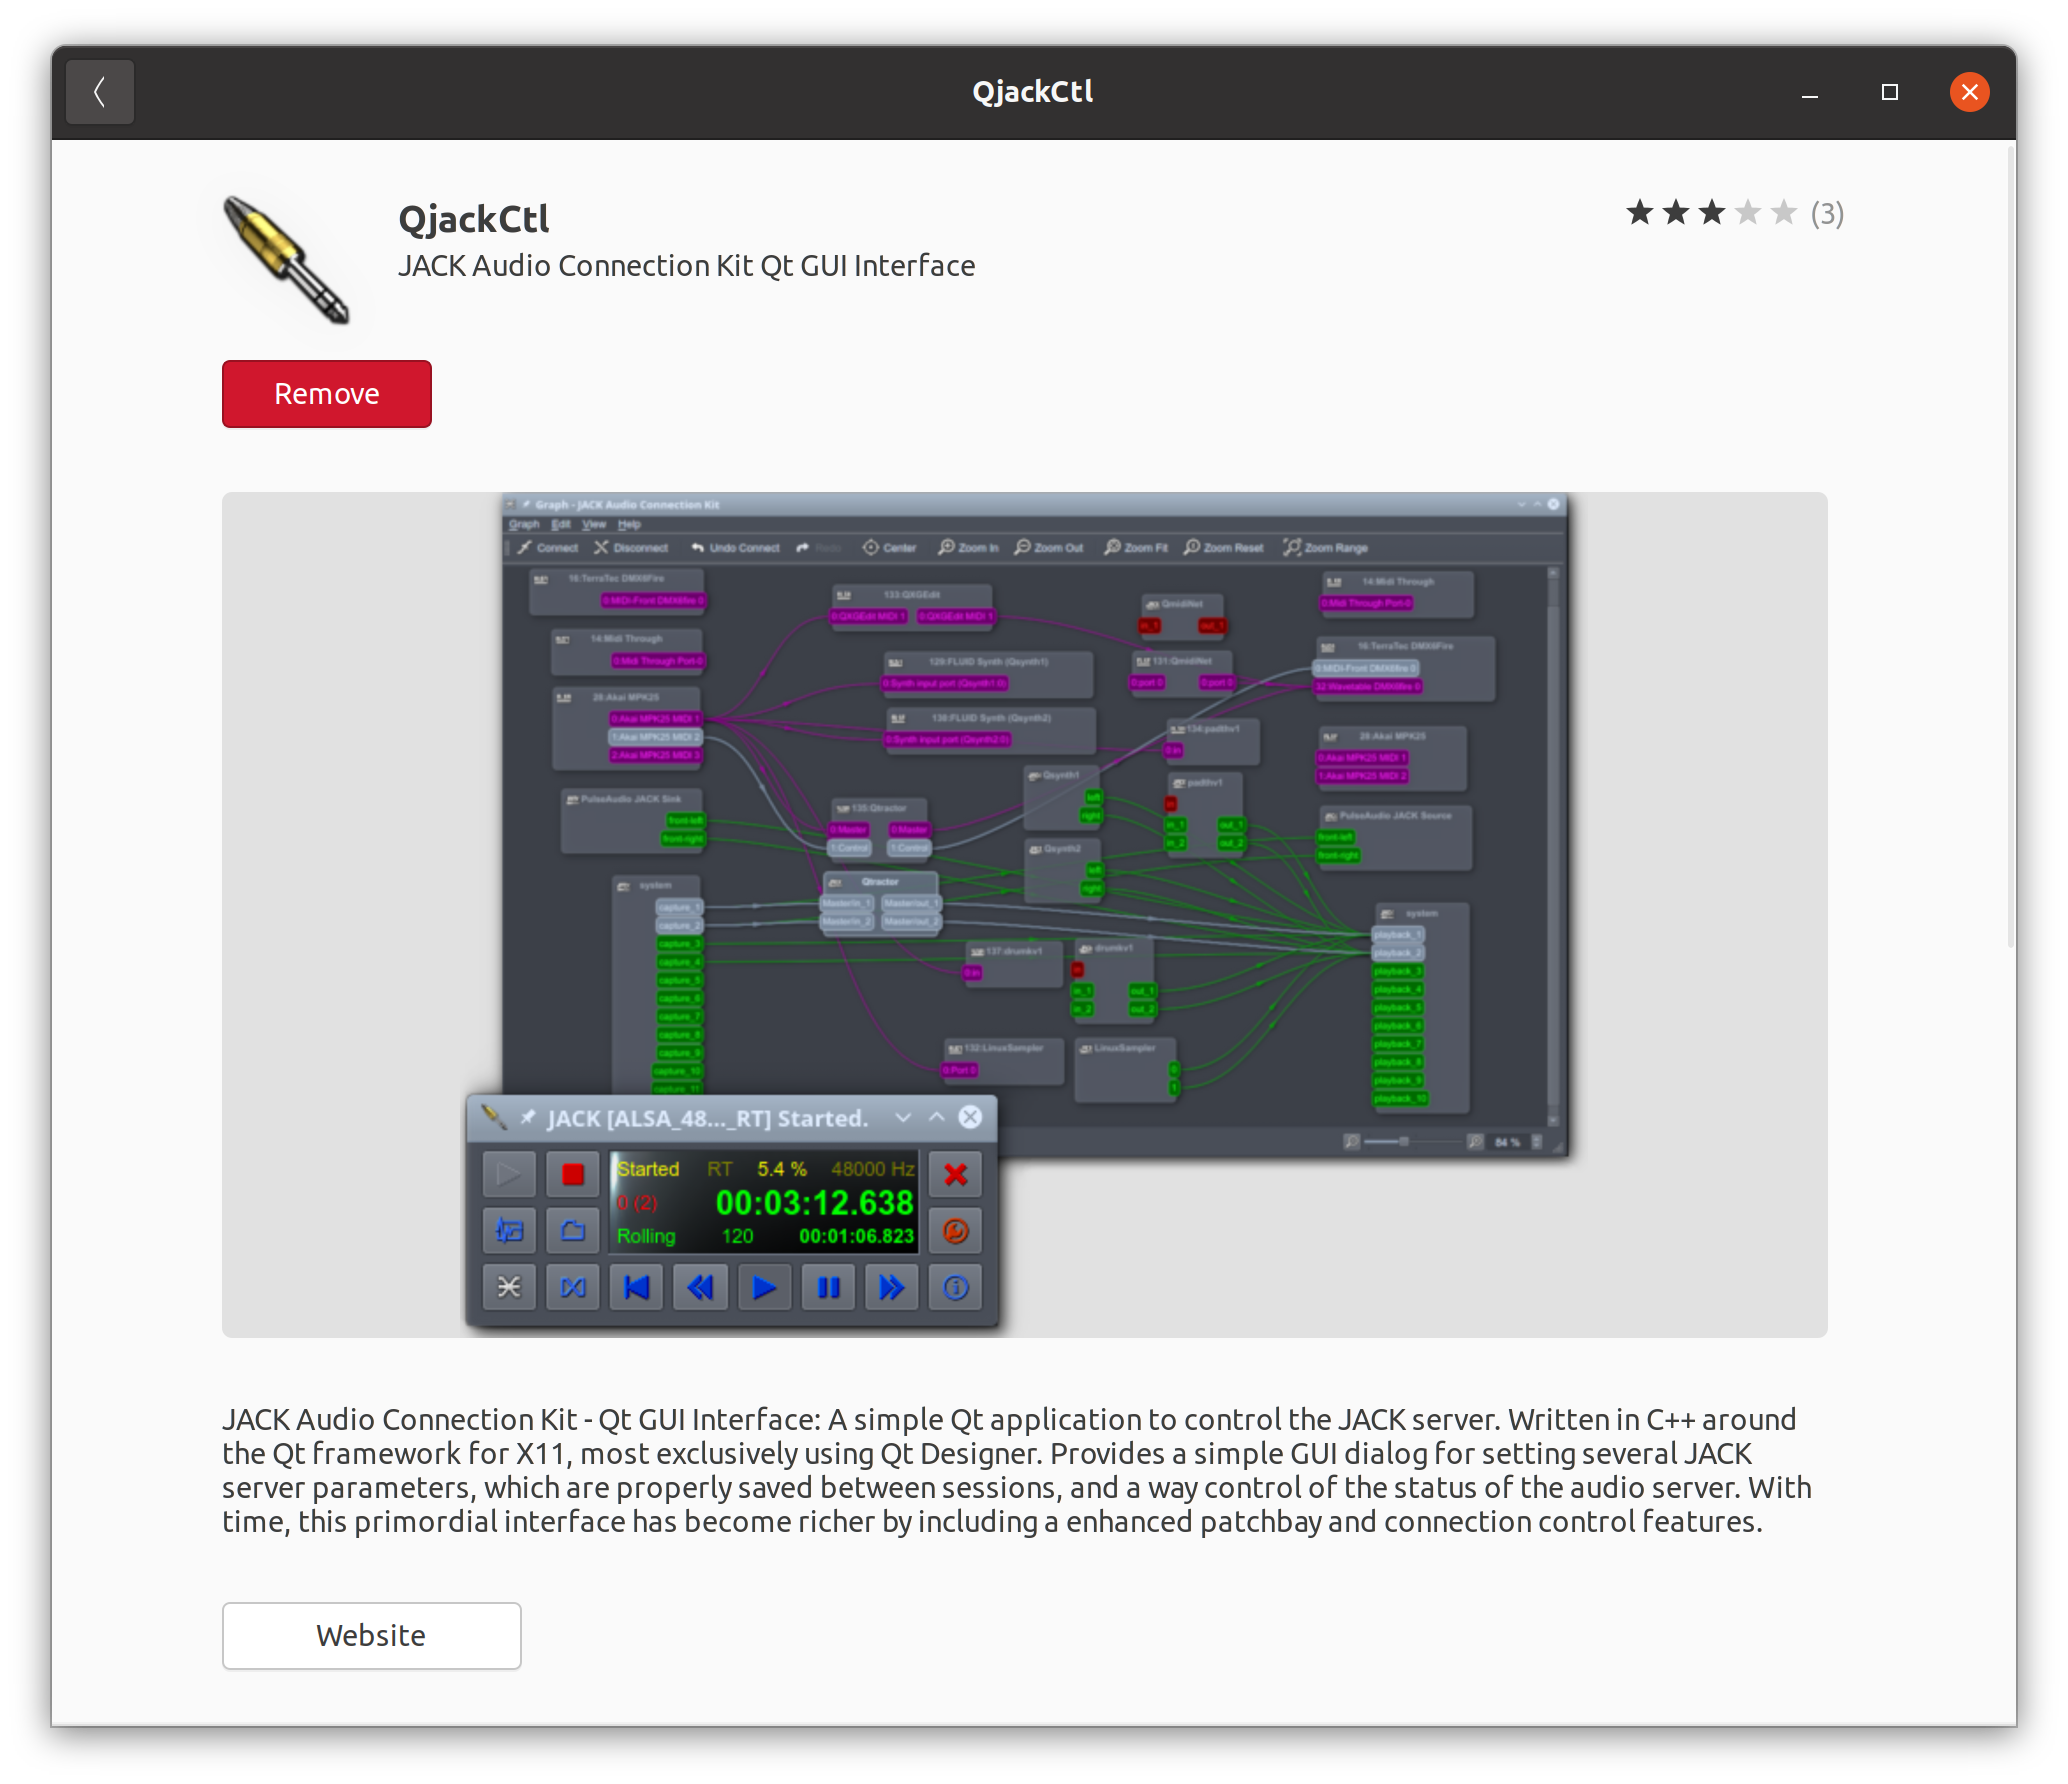
- JACK Qt GUI Interface, to configure JACK server
- a sound card with input and ouput (here I'm using a Zoom H6 that allows up to 6 local guests)
- some microphones
- some headphones
Note: If you never used Ardour, here is a very good video made by @unfa@mastodon.social that will help you understand the basics: Ardour 6 Quickstart (recording, editing, mixing and exporting)
Setup
-
If you do not have them installed already, install Jack Audio and QjackCtl:
-
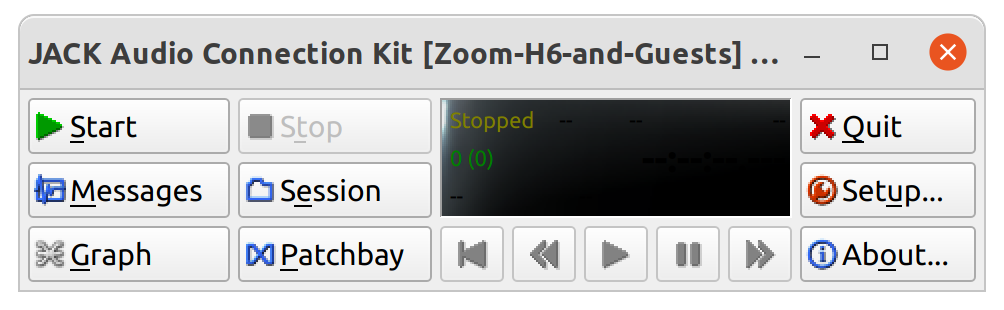
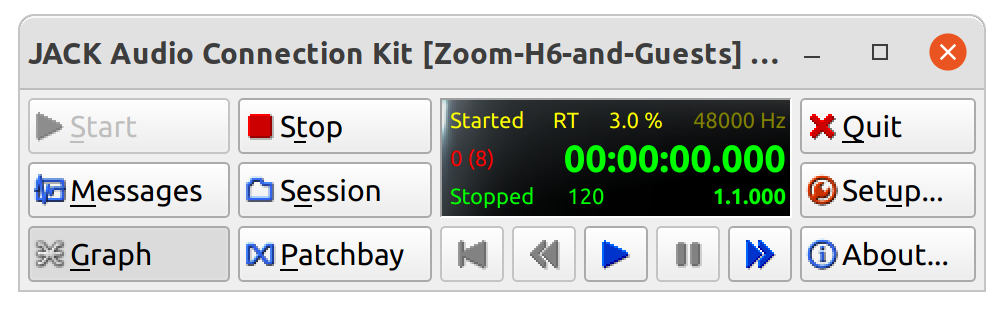
Launch QjackCtl:
-
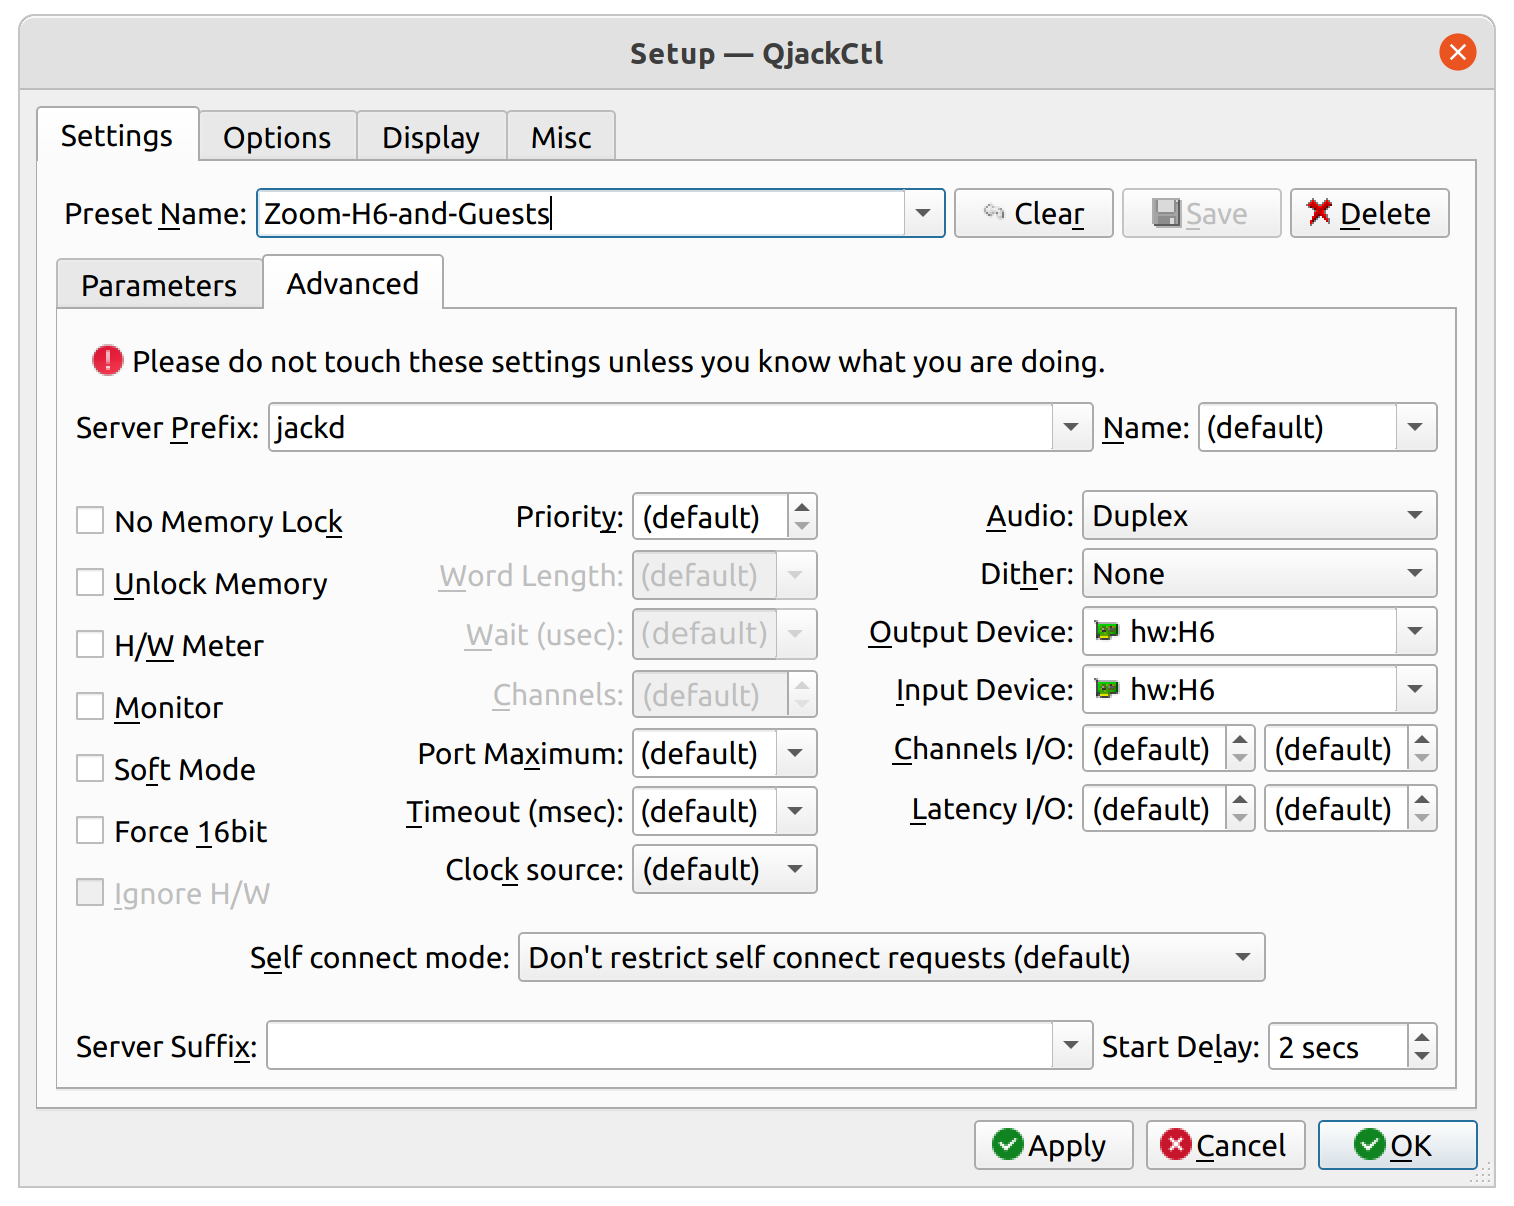
Click on the “Setup…” button
-
Select the “Input Device” and “Output Device” you want to use:
-
Create several sources and sinks, one per VoIP application, plus one as a default sound device.
We will assign each one to a specific software:
- Jack_Source_Default and Jack_Sink_Default as the default sound device for the computer.
- Jack_Source_Jitsi and Jack_Sink_Jitsi for Jitsi.
- Jack_Source_Meet and Jack_Sink_Meet for Meet.
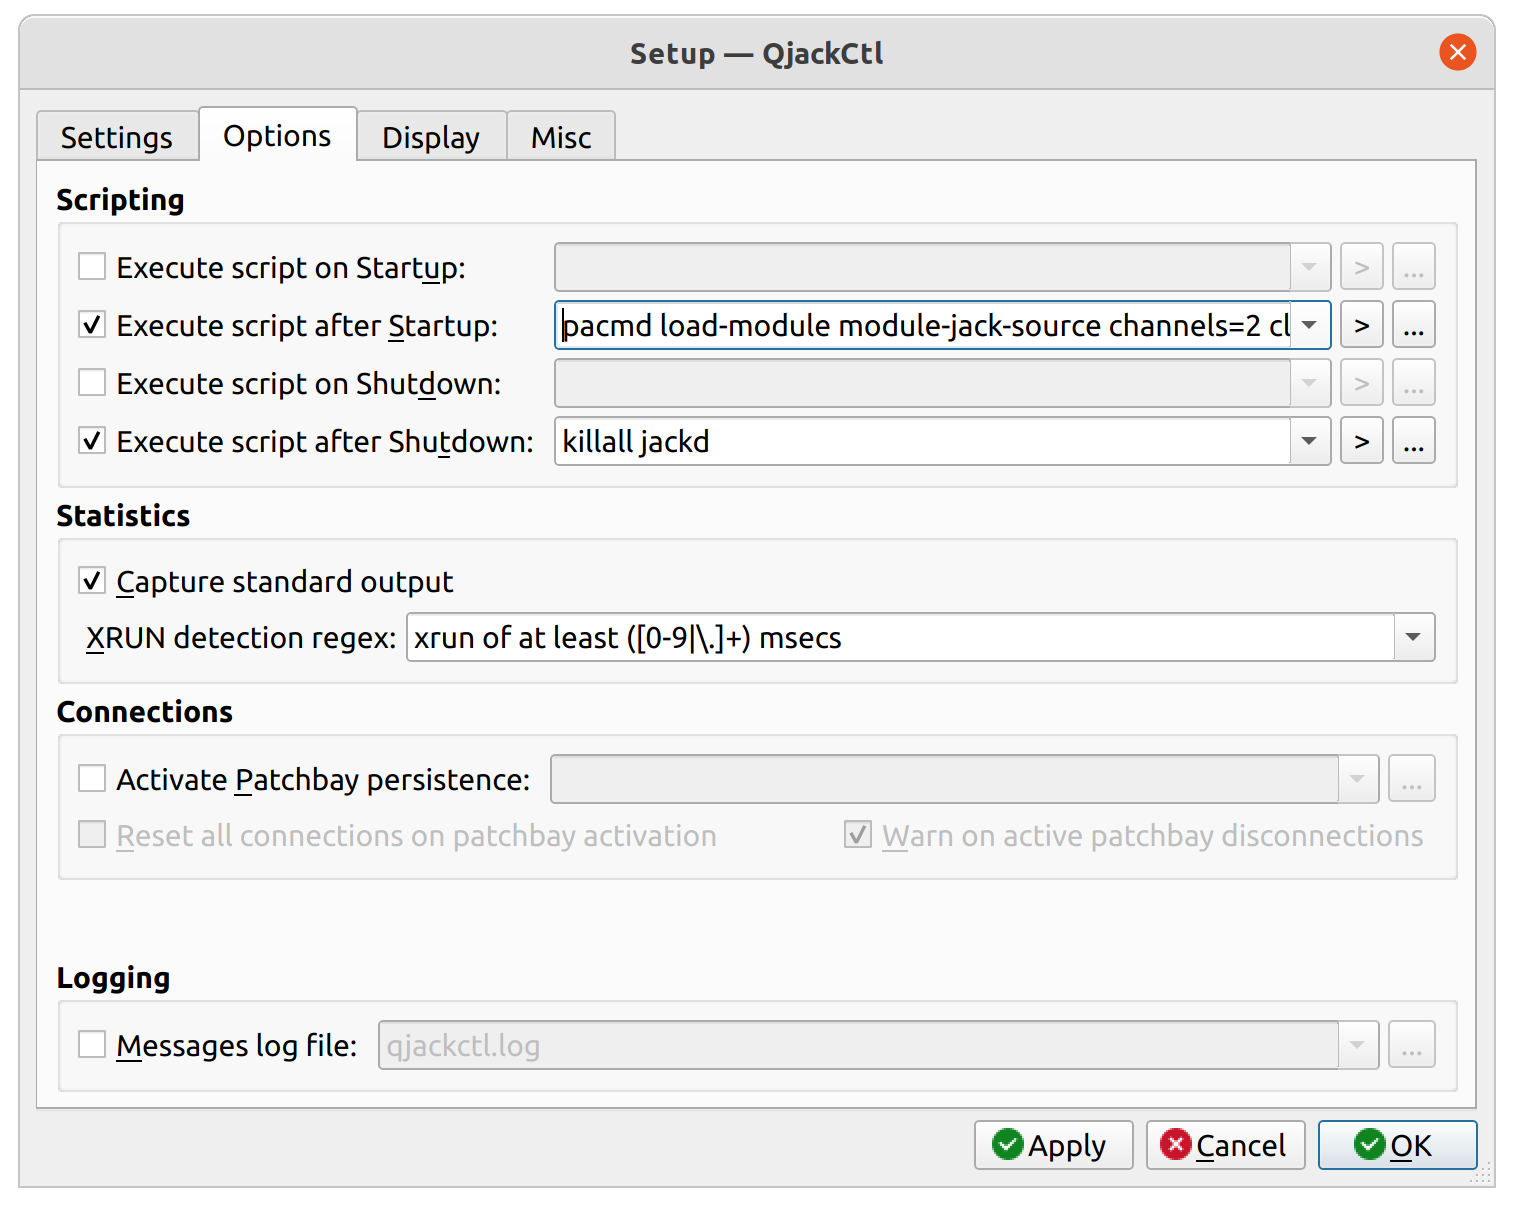
In order to do so, copy and paste the following script (you may adapt it to your needs) in the field “Execute script after startup”:
pacmd load-module module-jack-source channels=2 client_name=Jack_Source_Default;
pacmd load-module module-jack-sink channels=2 client_name=Jack_Sink_Default;
pacmd load-module module-jack-source channels=2 client_name=Jack_Source_Jitsi;
pacmd load-module module-jack-sink channels=2 client_name=Jack_Sink_Jitsi;
pacmd load-module module-jack-source channels=2 client_name=Jack_Source_Meet;
pacmd load-module module-jack-sink channels=2 client_name=Jack_Sink_Meet;
In “Execute script after Shutdown” type the following:
killall jackd
-
You may now start Jack Audio by clicking… “Start”:
-
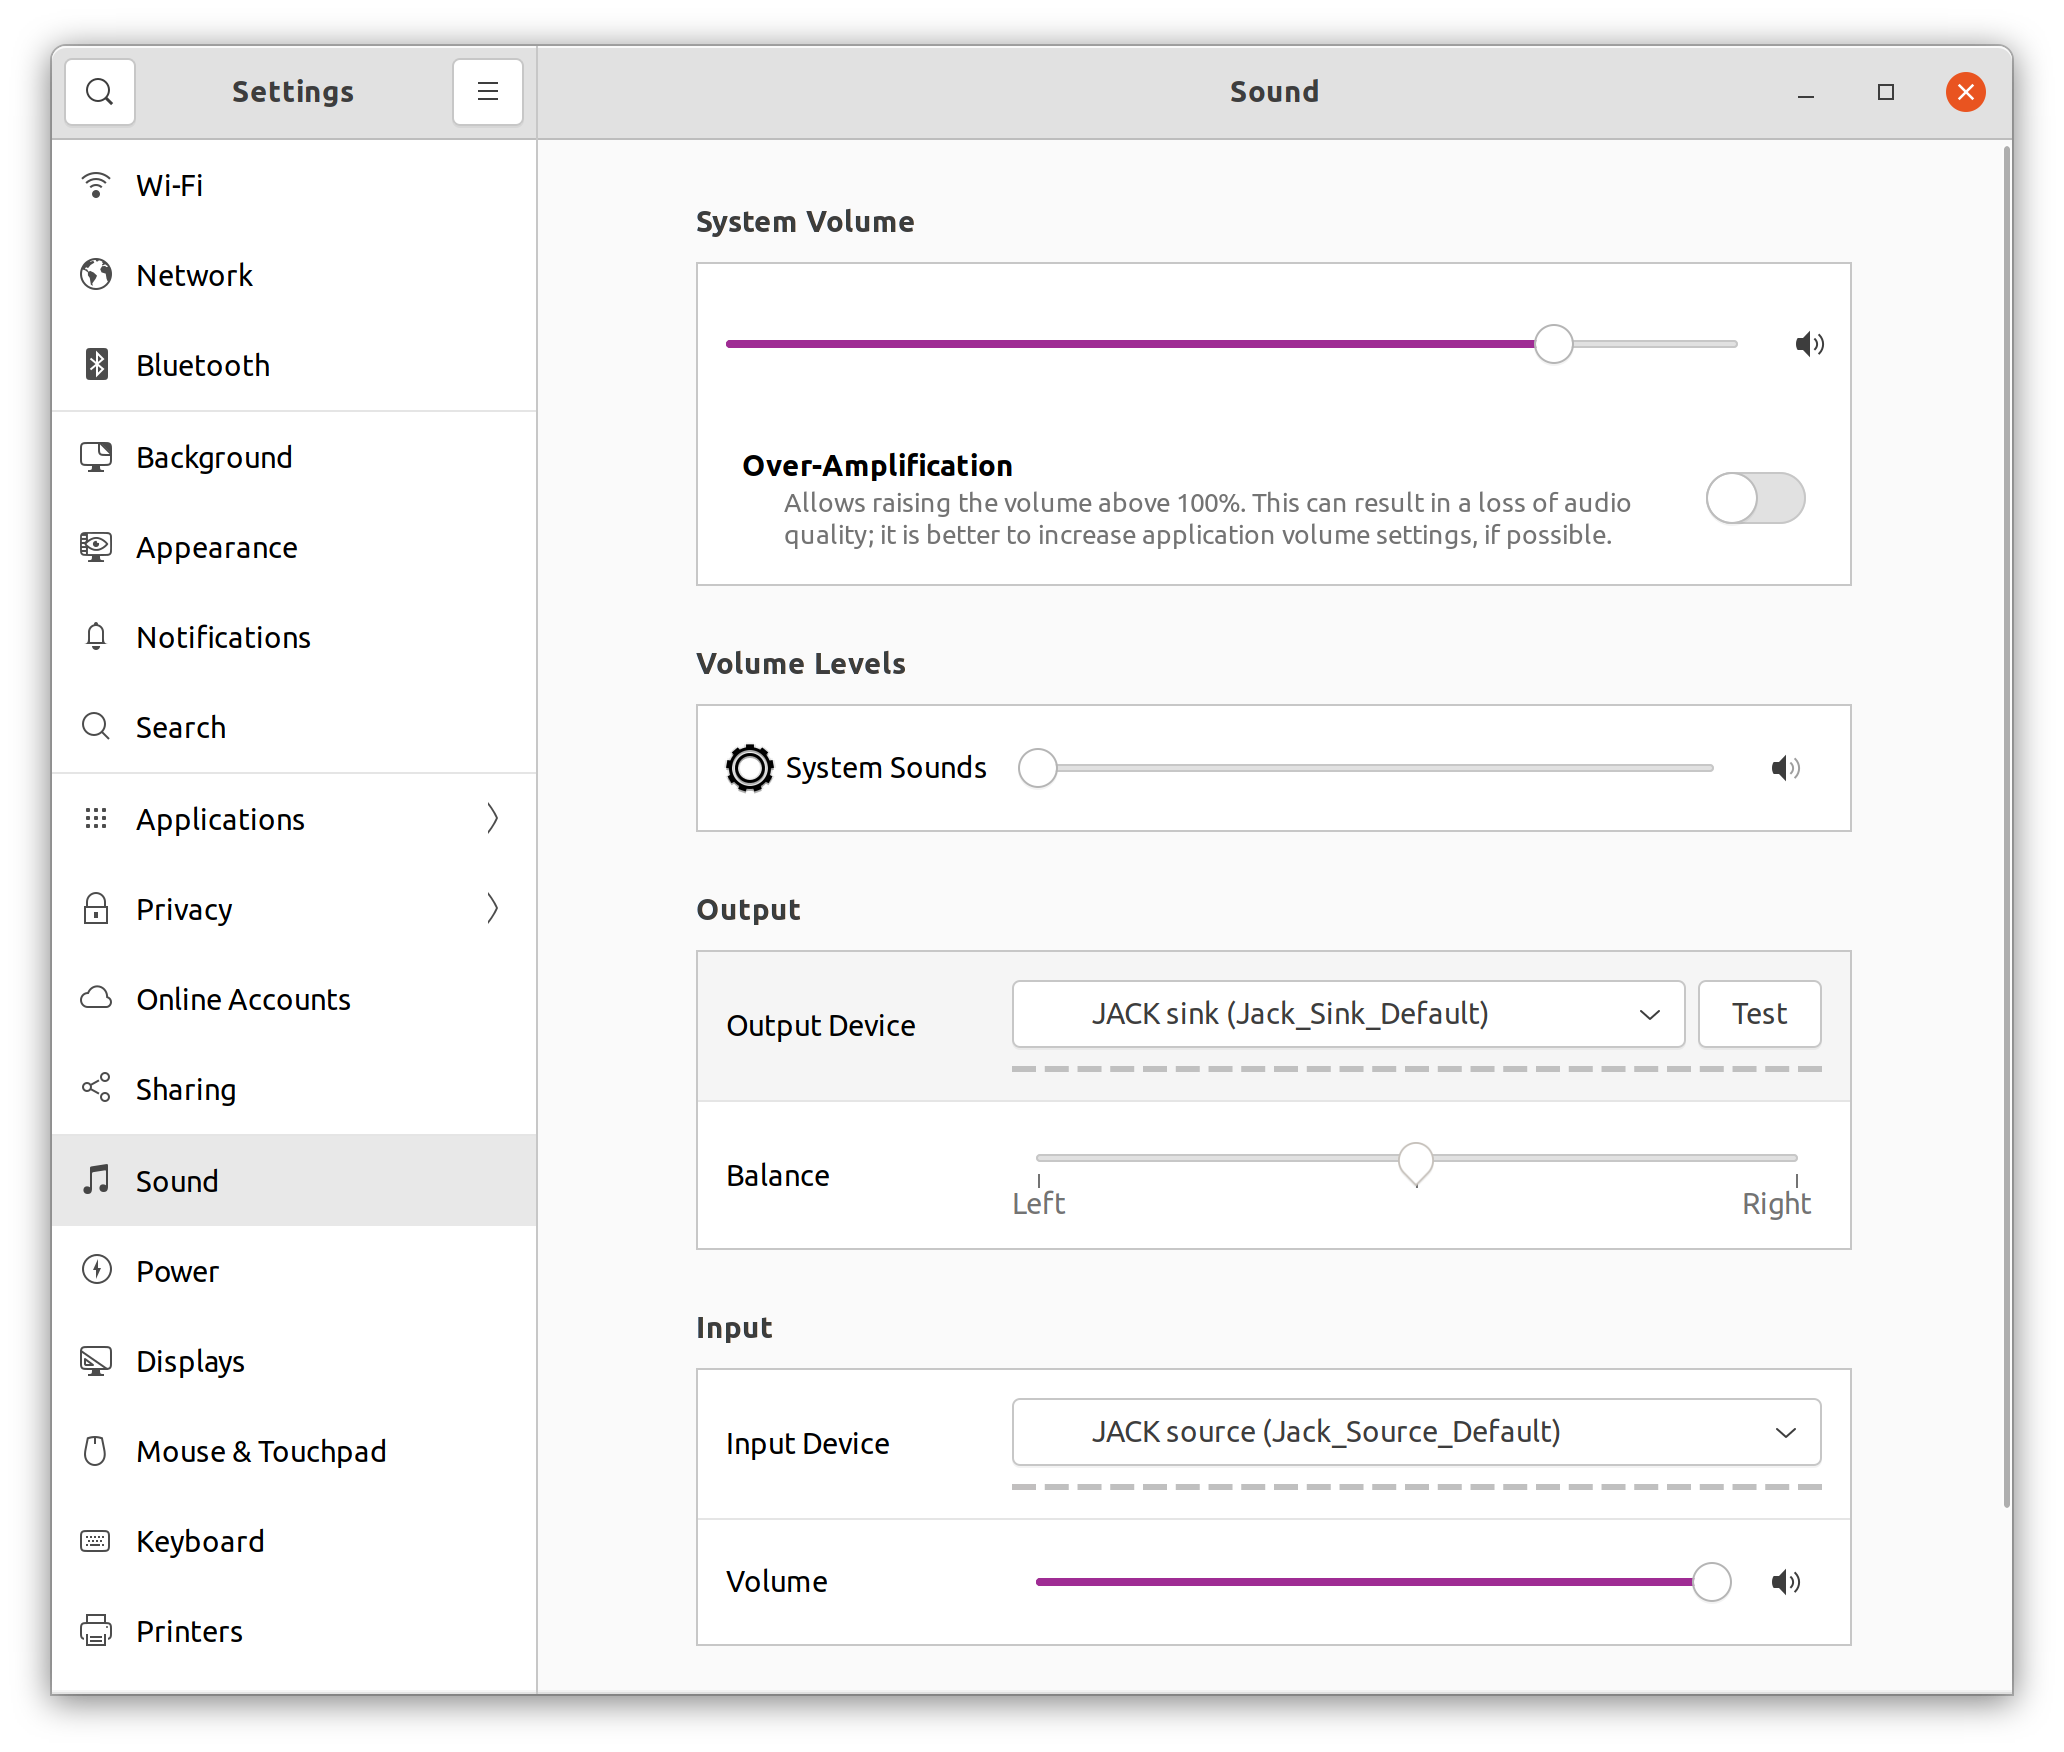
In Ubuntu Settings Panel, define “Jack_Source_Default” and “Jack_Sink_Default” as your default sound input and output device:
-
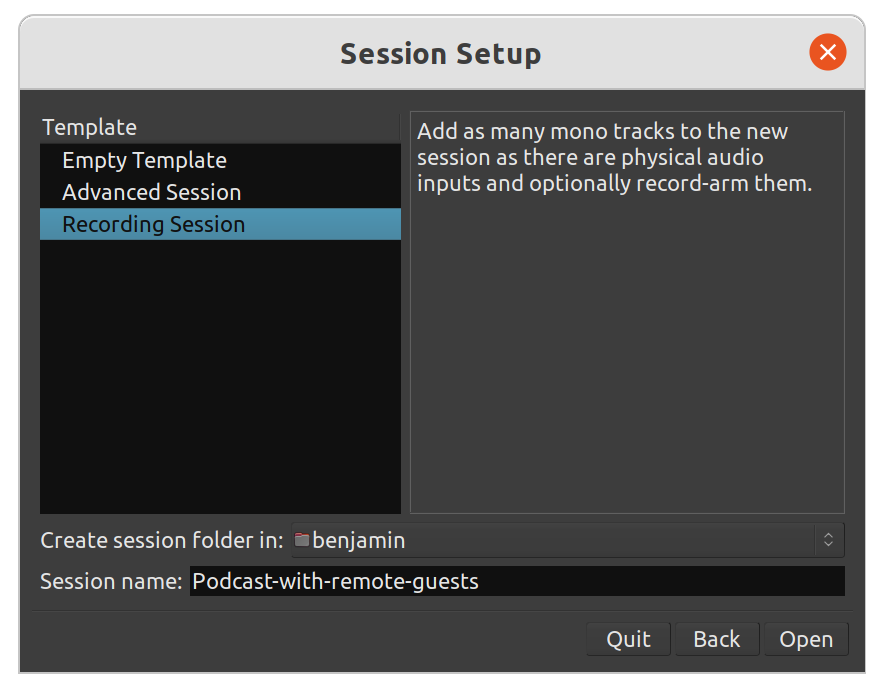
Launch Ardour, create a “New Session”, select “Recording Session”:
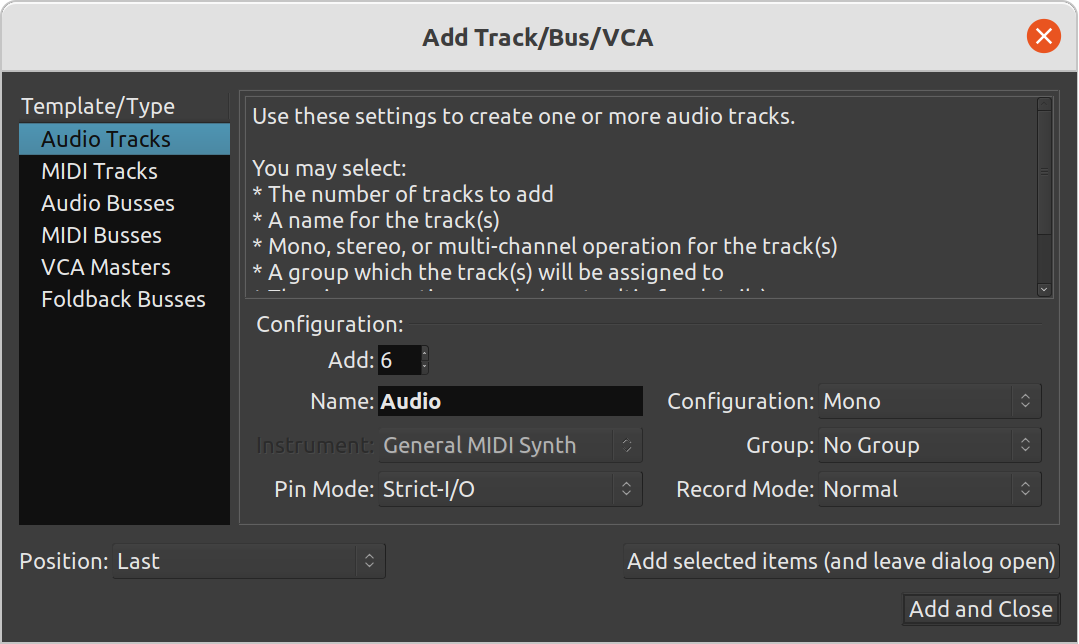
Add one mono track per local guest, one stereo track per remote guest (SHIFT+CTRL+N). I recommend that you name the tracks after the name of the application they will record.
-
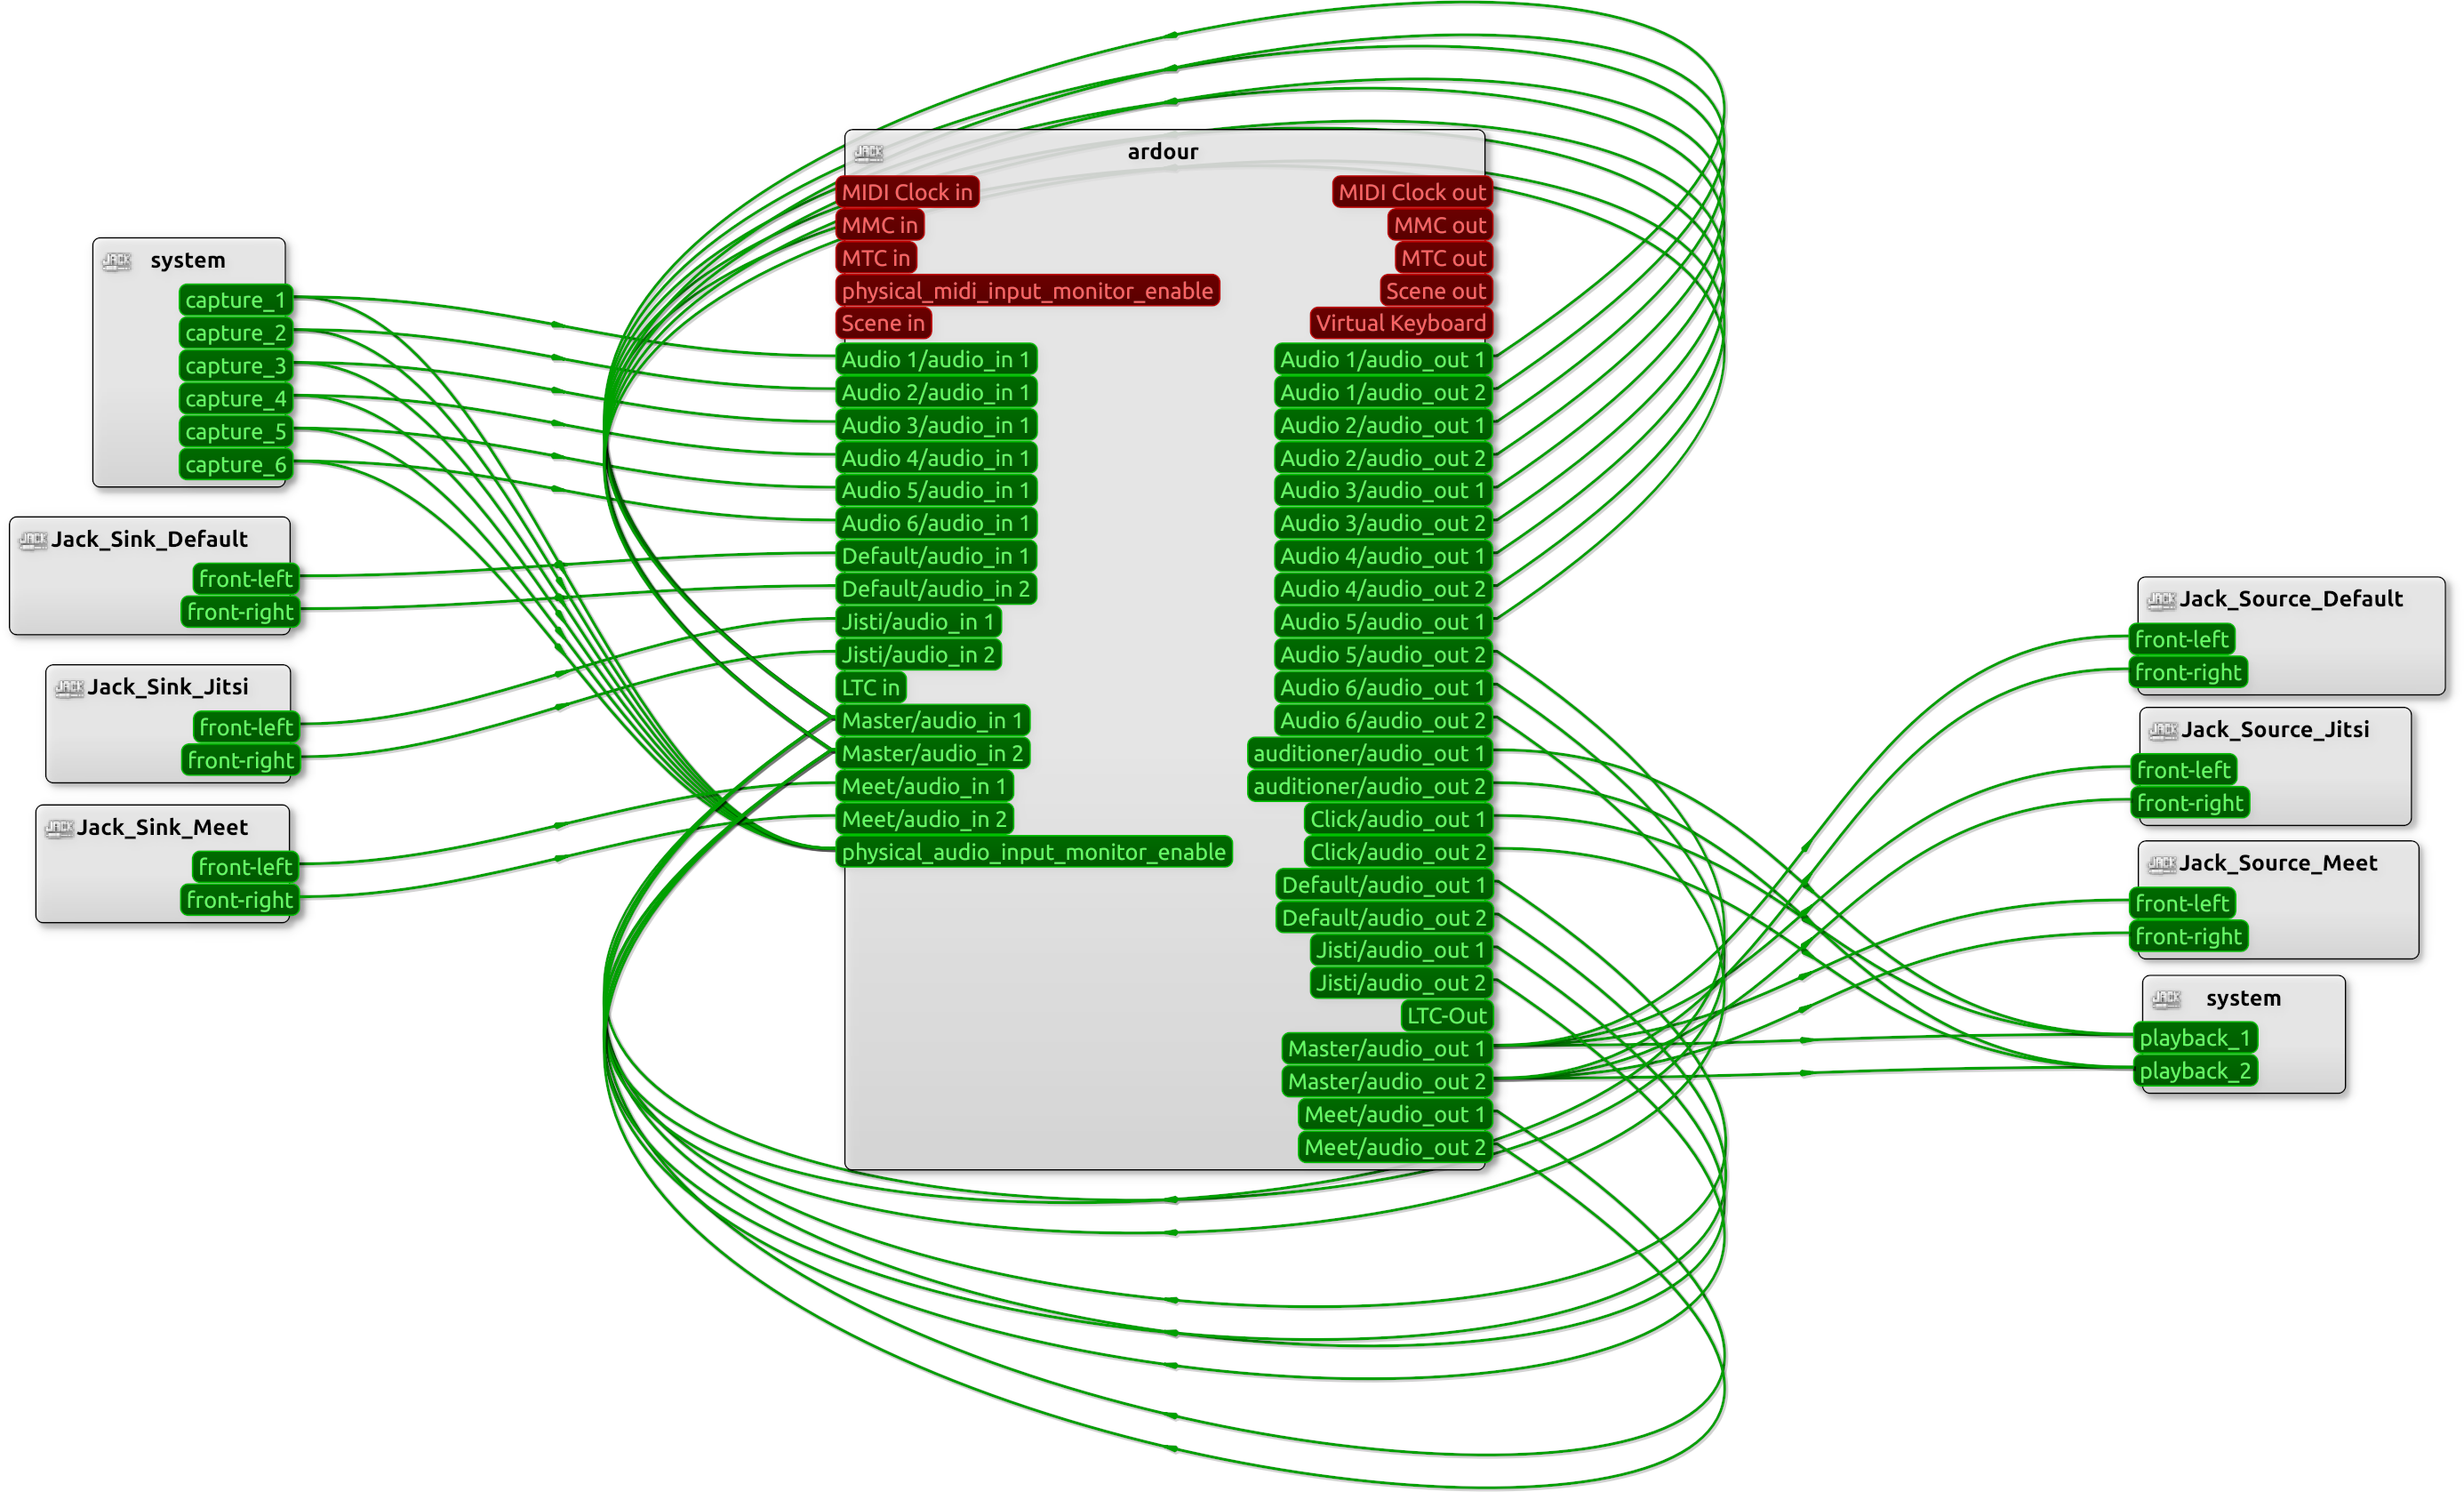
Now go back to QjackCtl, open the “Graph” Window and map all applications and microphones, in and out.
This is where you decide who can hear whom, so you will probably need to edit that graph a few times before it works as intented.
-
Launch your VoIP applications and make them use the dedicated sound devices you previously created:
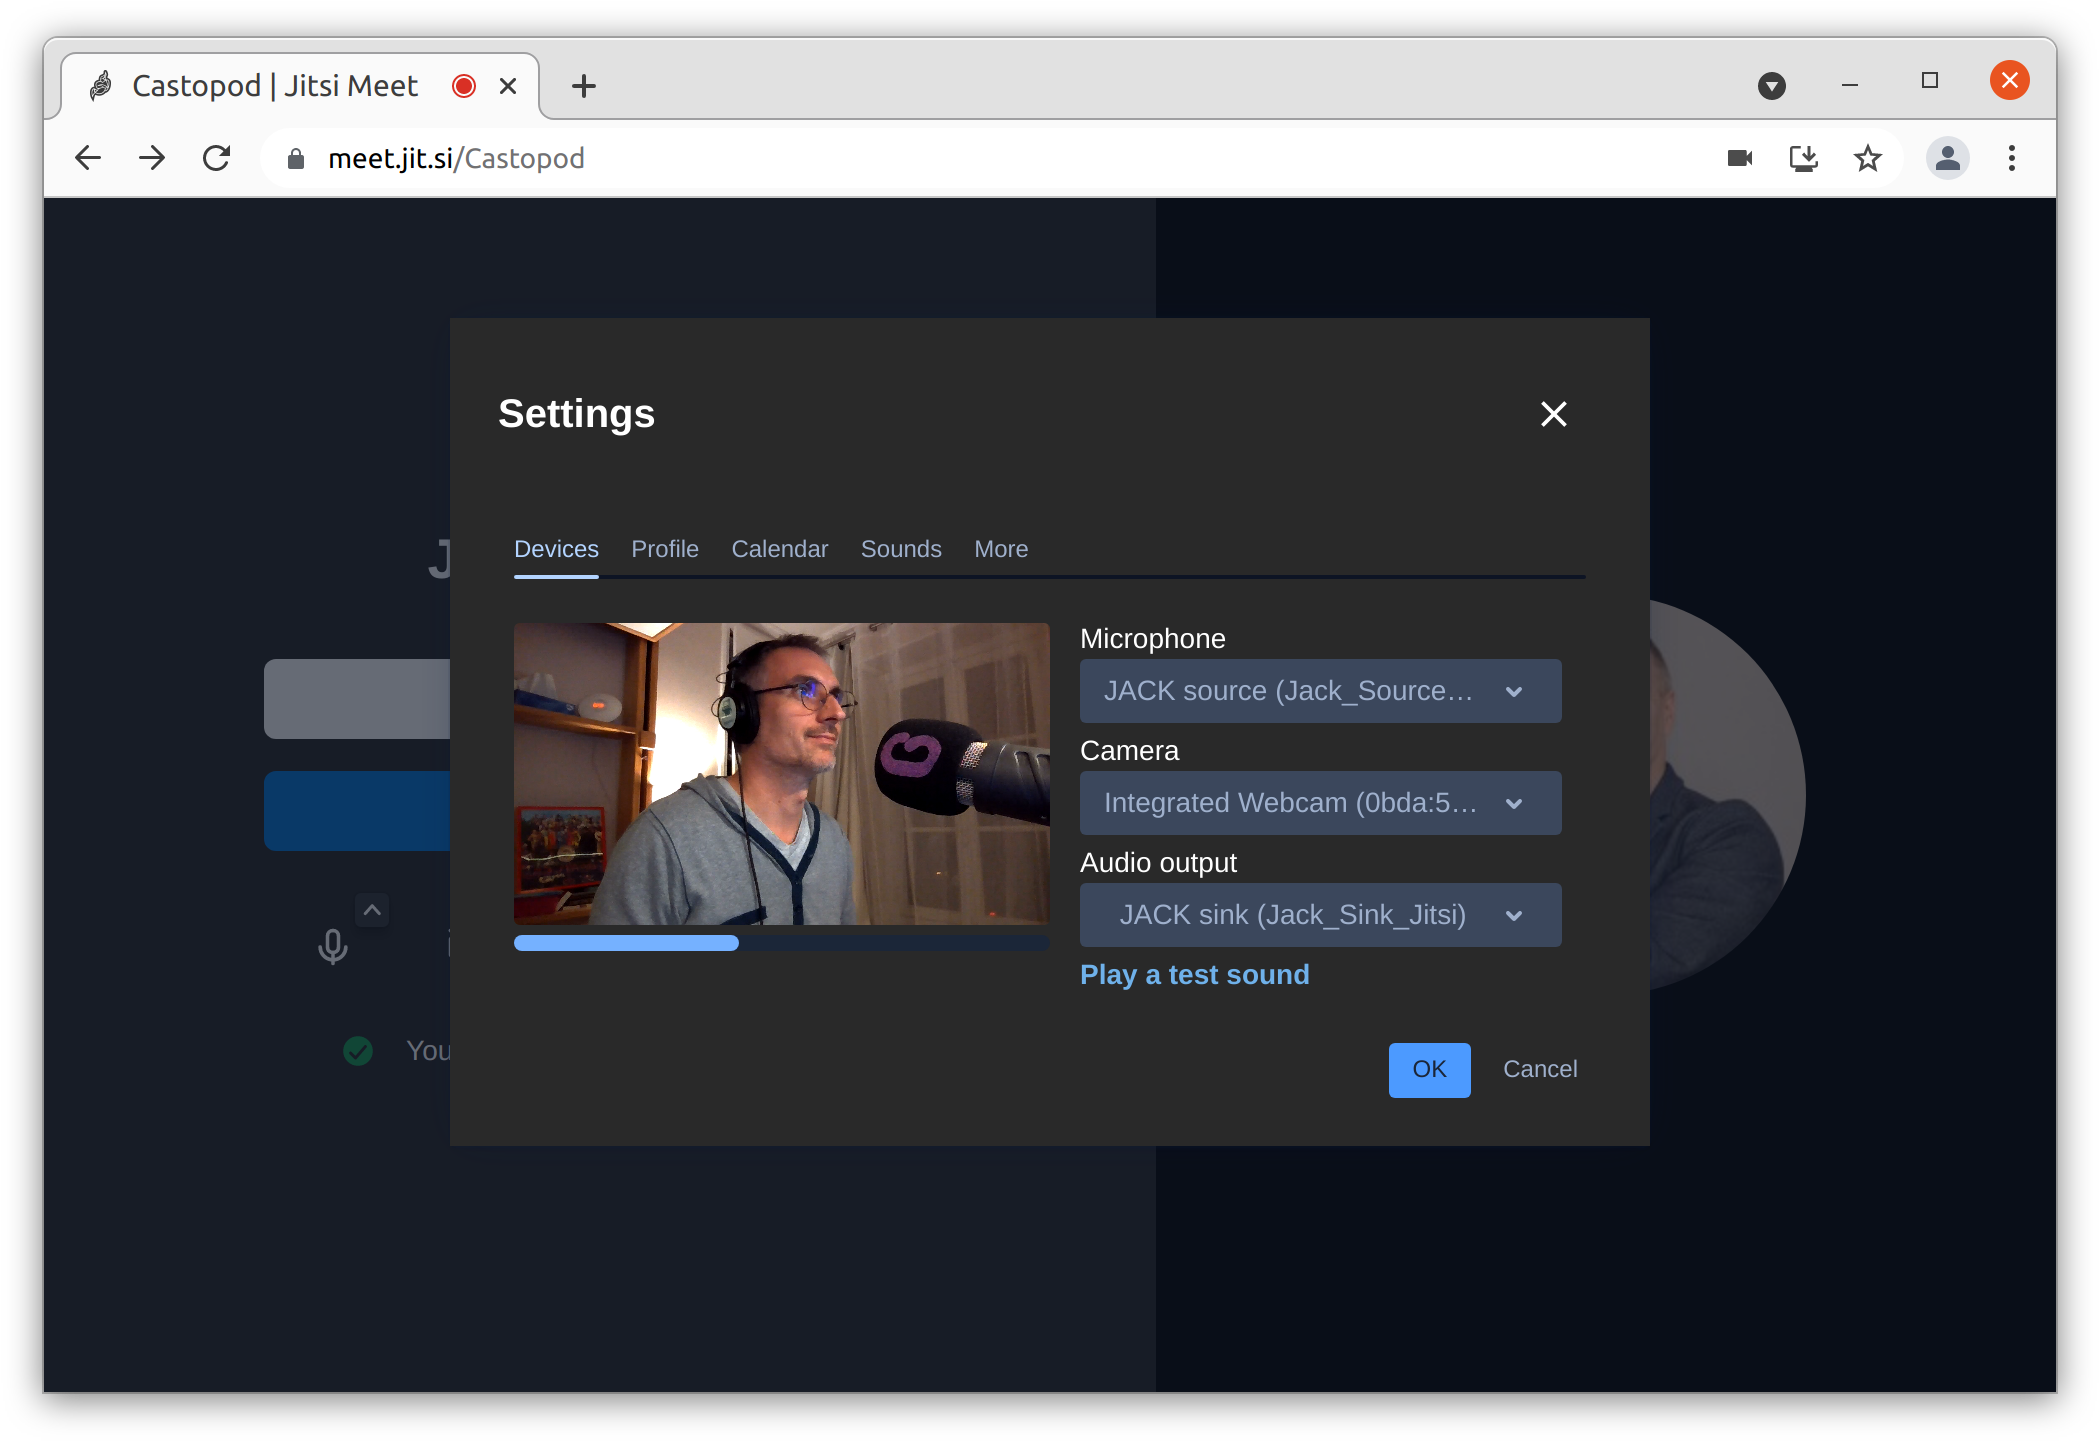
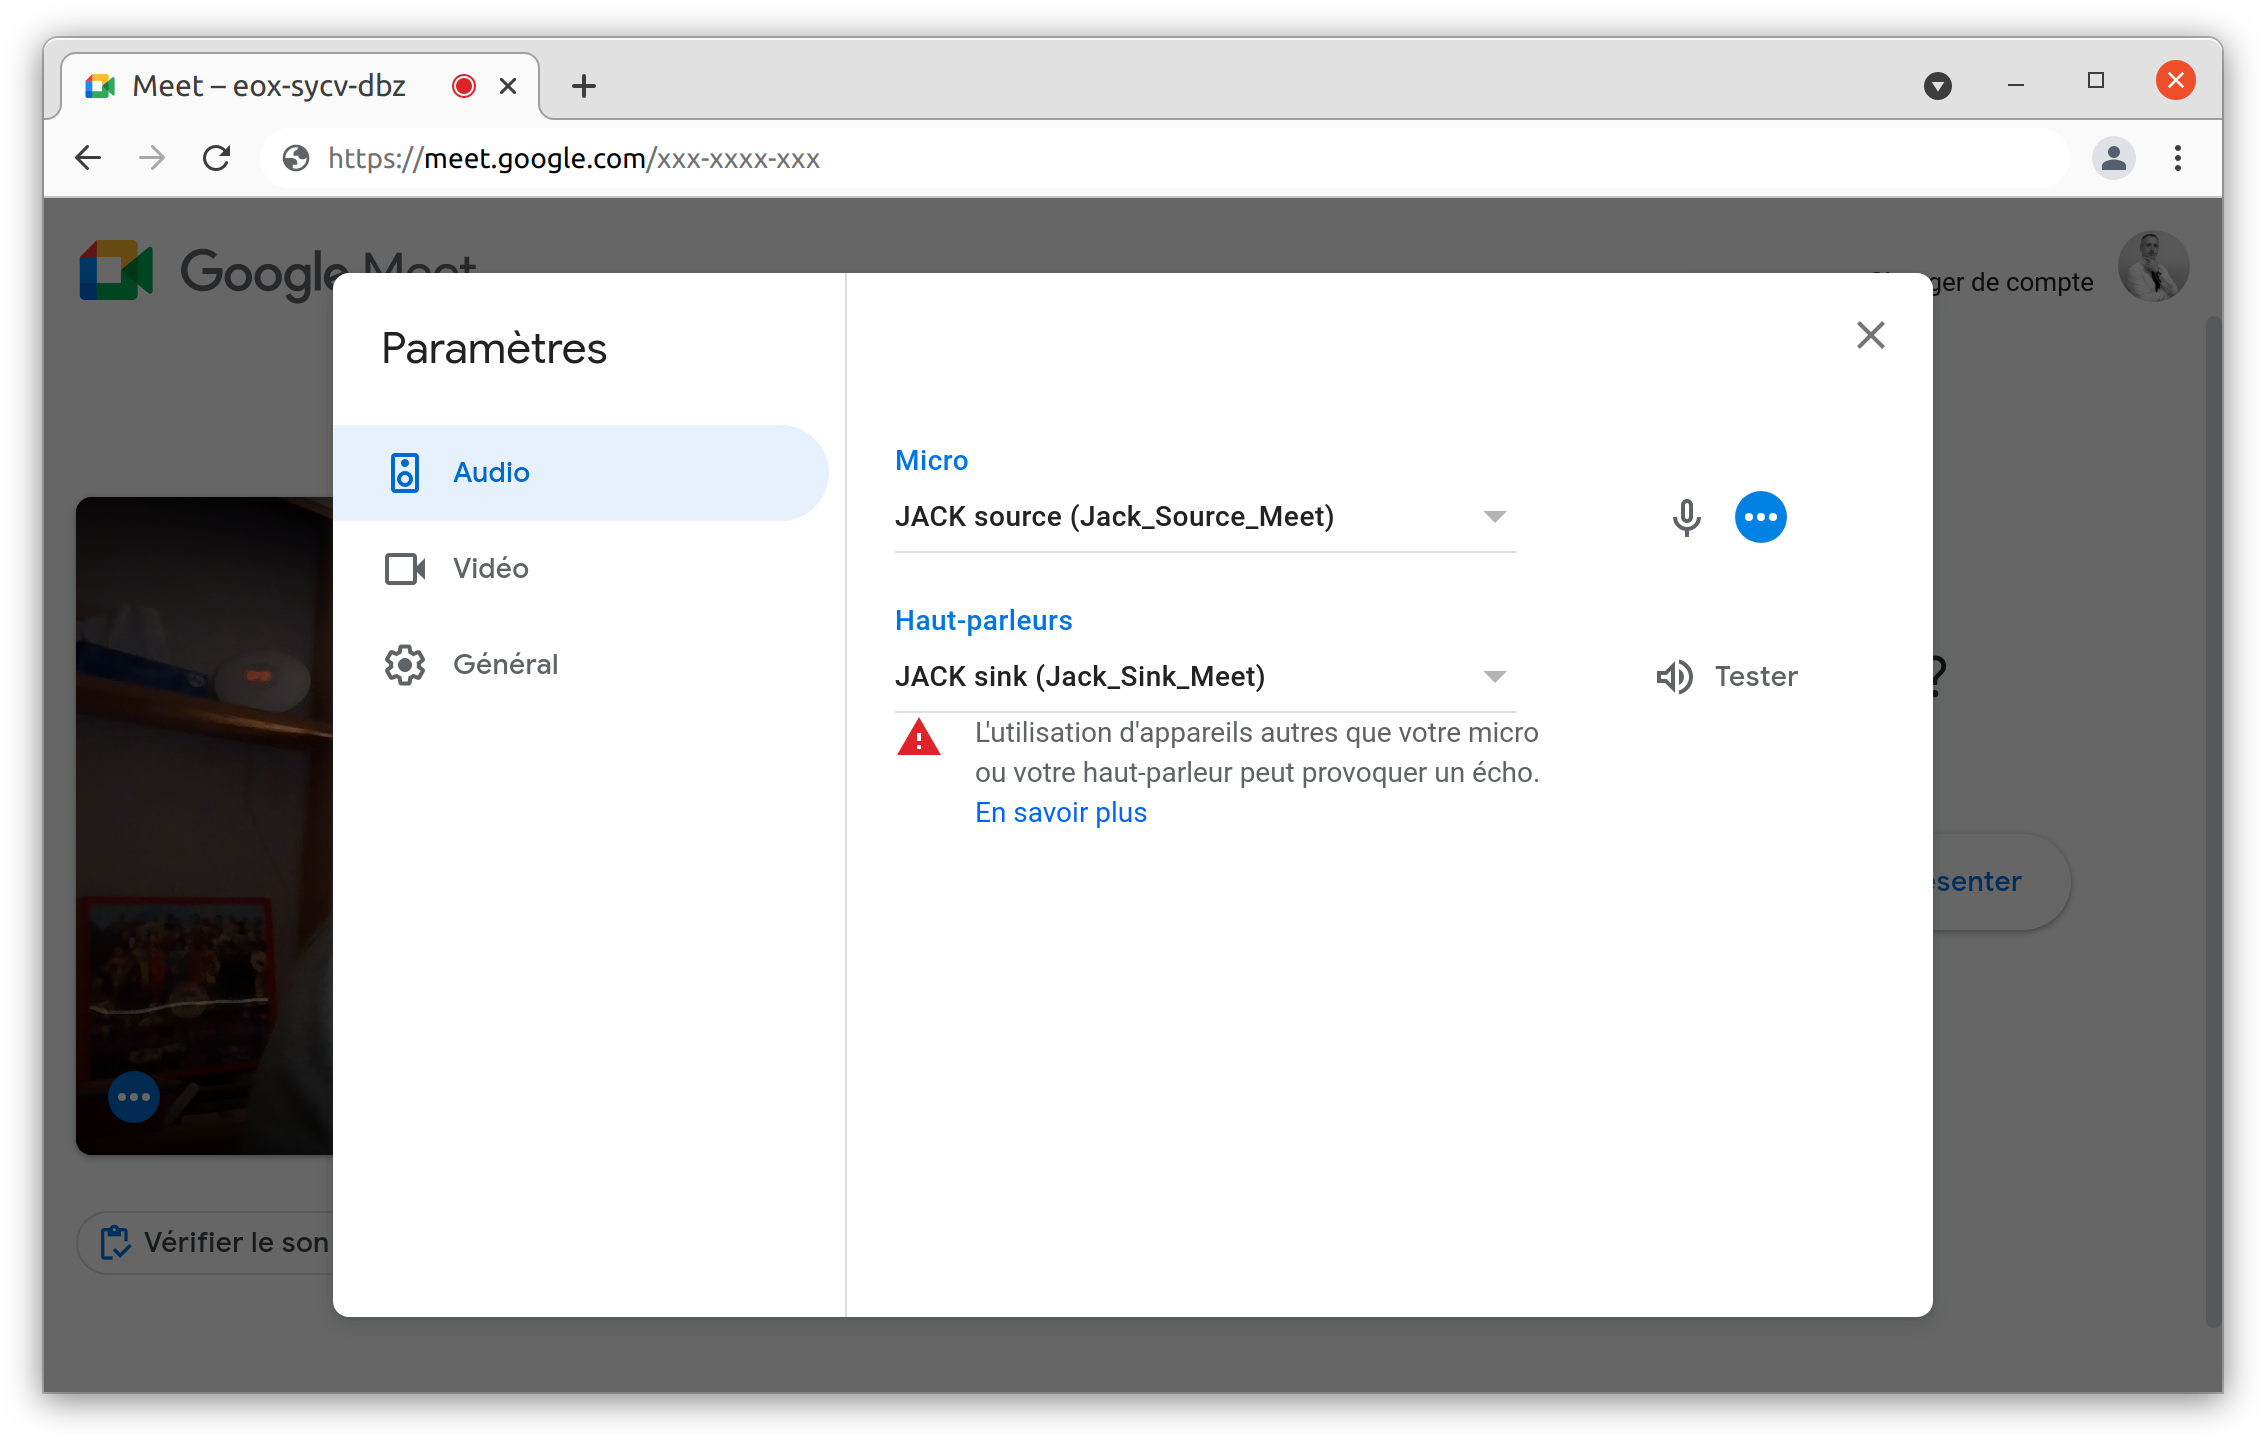
Please note that some old applications (such as Twinkle) will not let you select a Jack Audio device. In this case you will have to stick with the default one. -
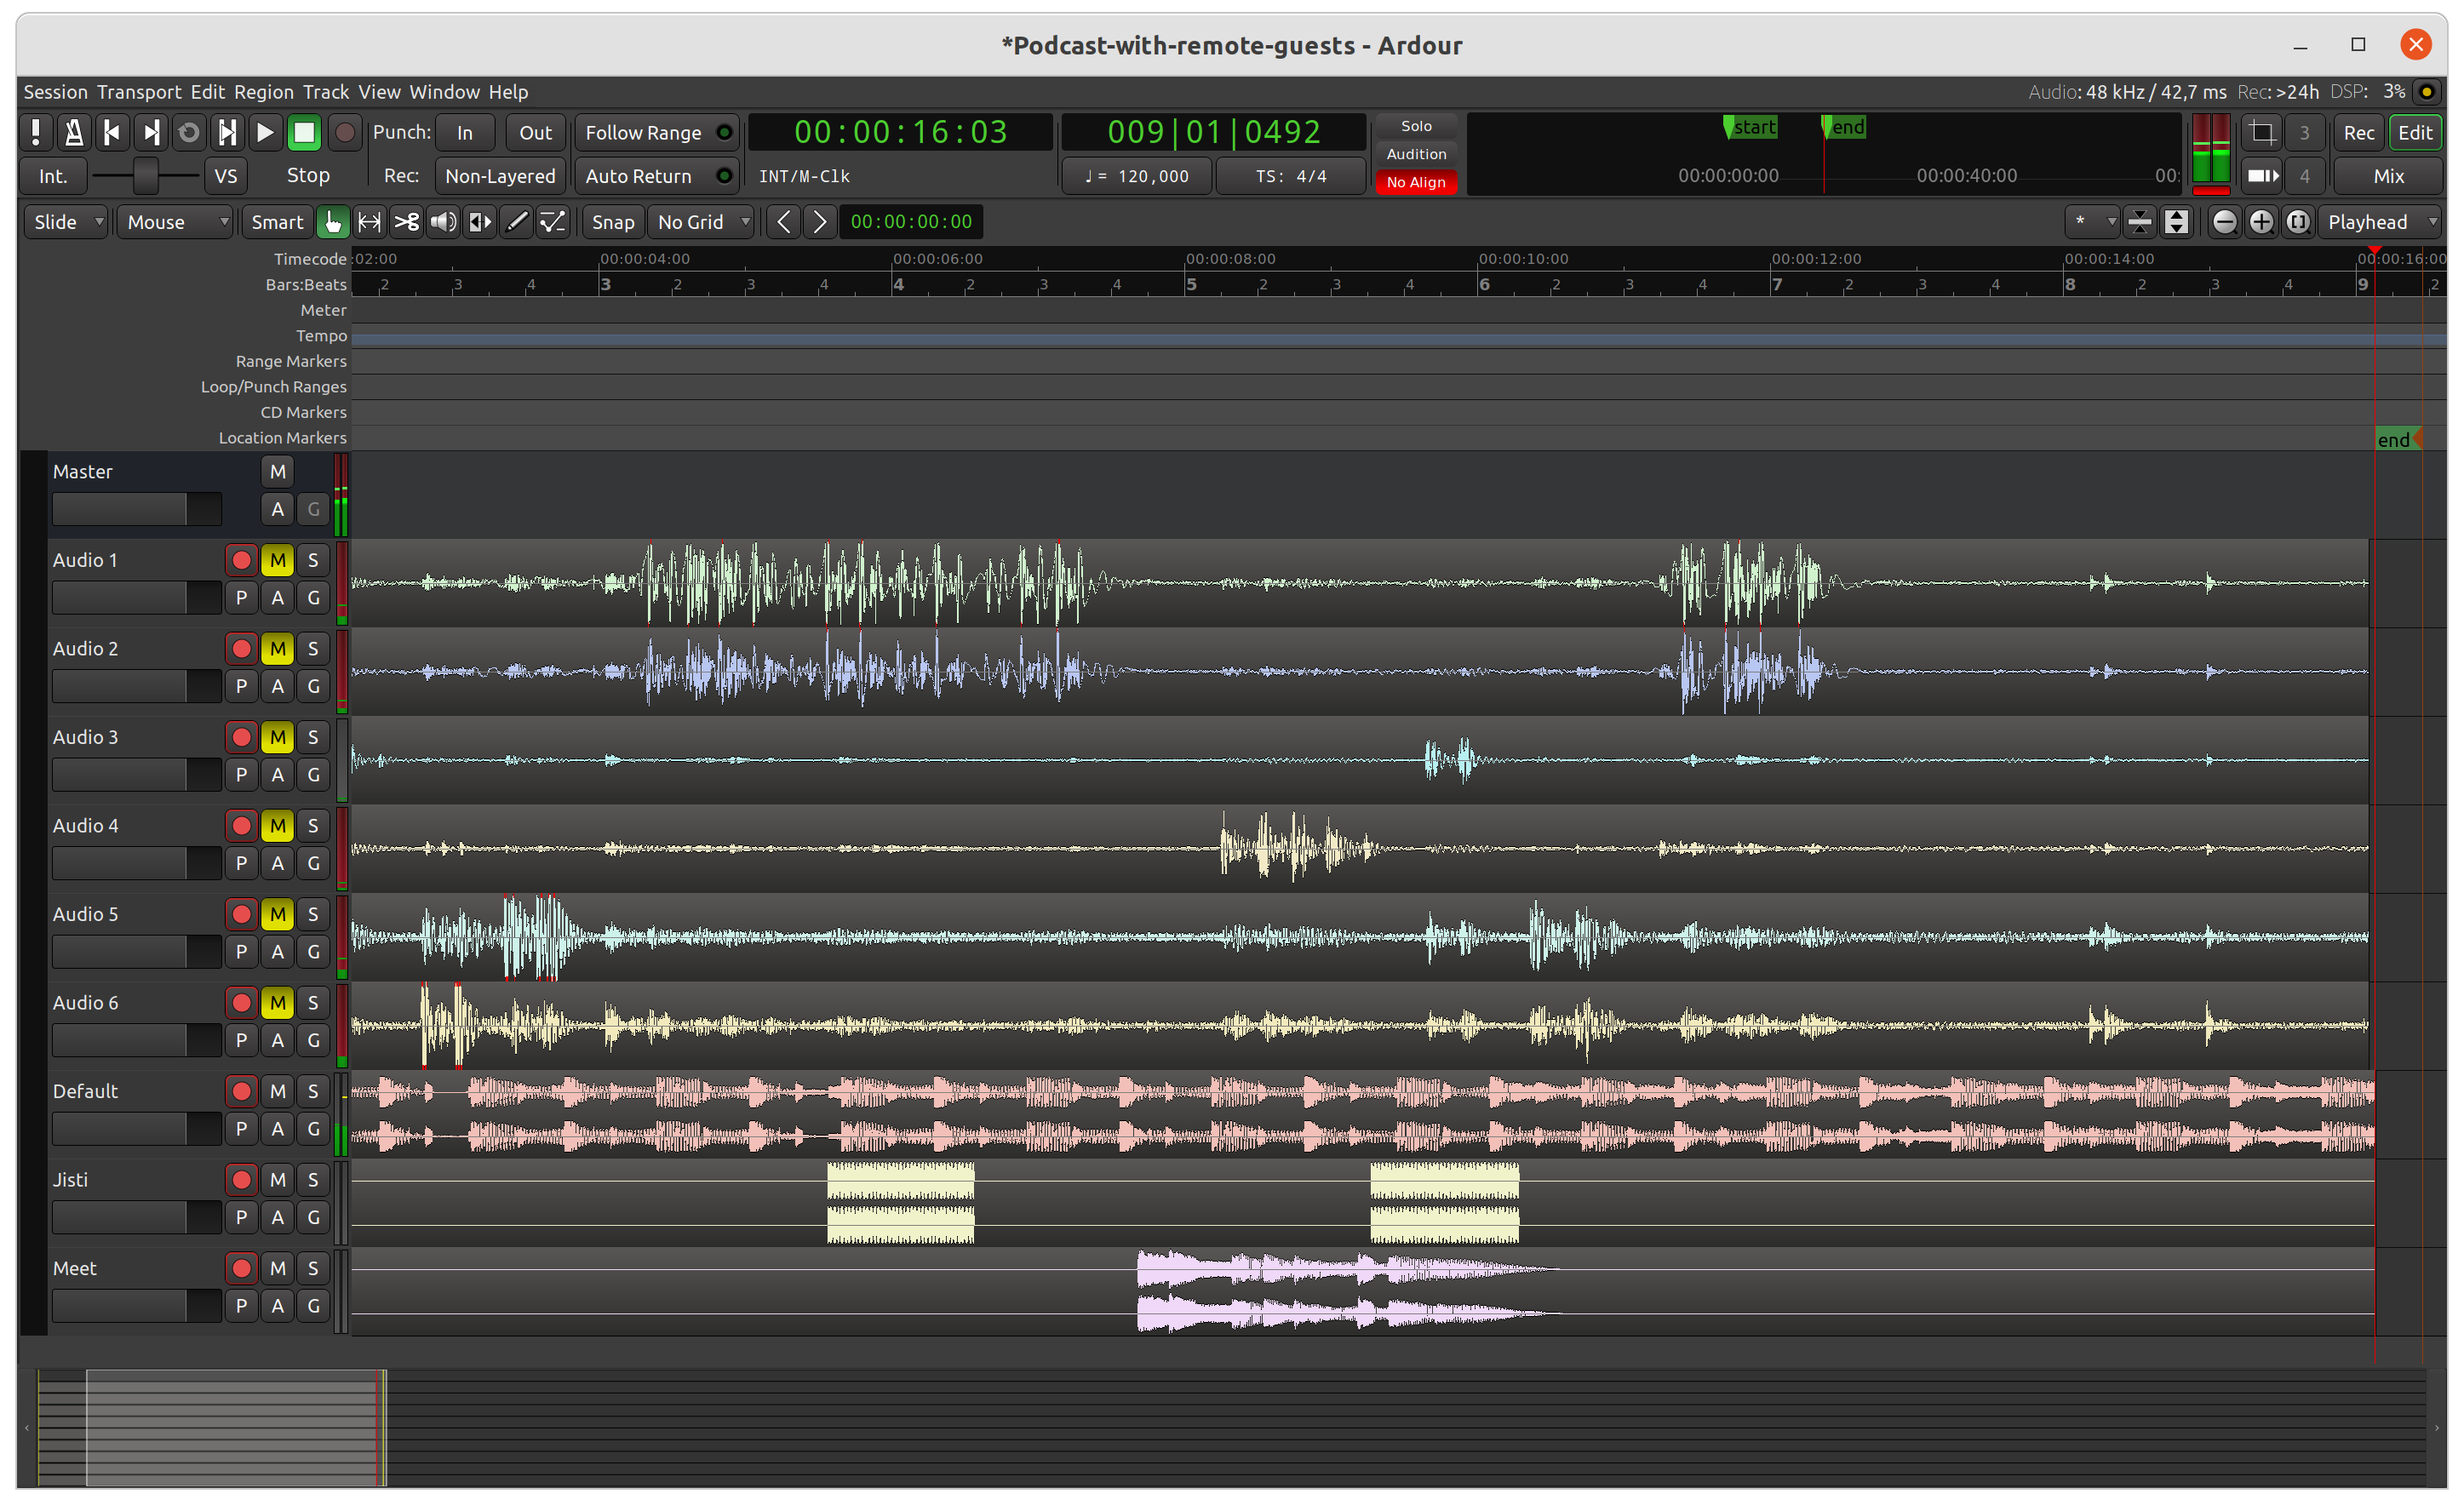
Go back to Ardour and start recording!
If you have any question, you may find me here: @benjaminbellamy@podcastindex.social.


